Build Your First Infrastructure
This walkthrough takes you through the whole Paxper workflow once: connect your AWS account, create a workspace, add a simple resource, plan and apply it, check the result and remove it again. After each step, a What you should see box tells you how to know it worked.
You’ll build a VPC without NAT gateways. It is a useful first resource and costs nothing while it exists.
You need: a Paxper account (see Getting Started) and access to an AWS account where you can create an IAM role.
Step 1: Connect your AWS account
- Go to Workspaces → Credentials and click Add Credential.
- Choose IAM role (recommended).
- Enter a Credential name, for example My AWS, and your 12-digit Account ID.
- Click Create role to open AWS and create the role. Keep the Paxper form open while you do this.
- Back in Paxper, save the credential.
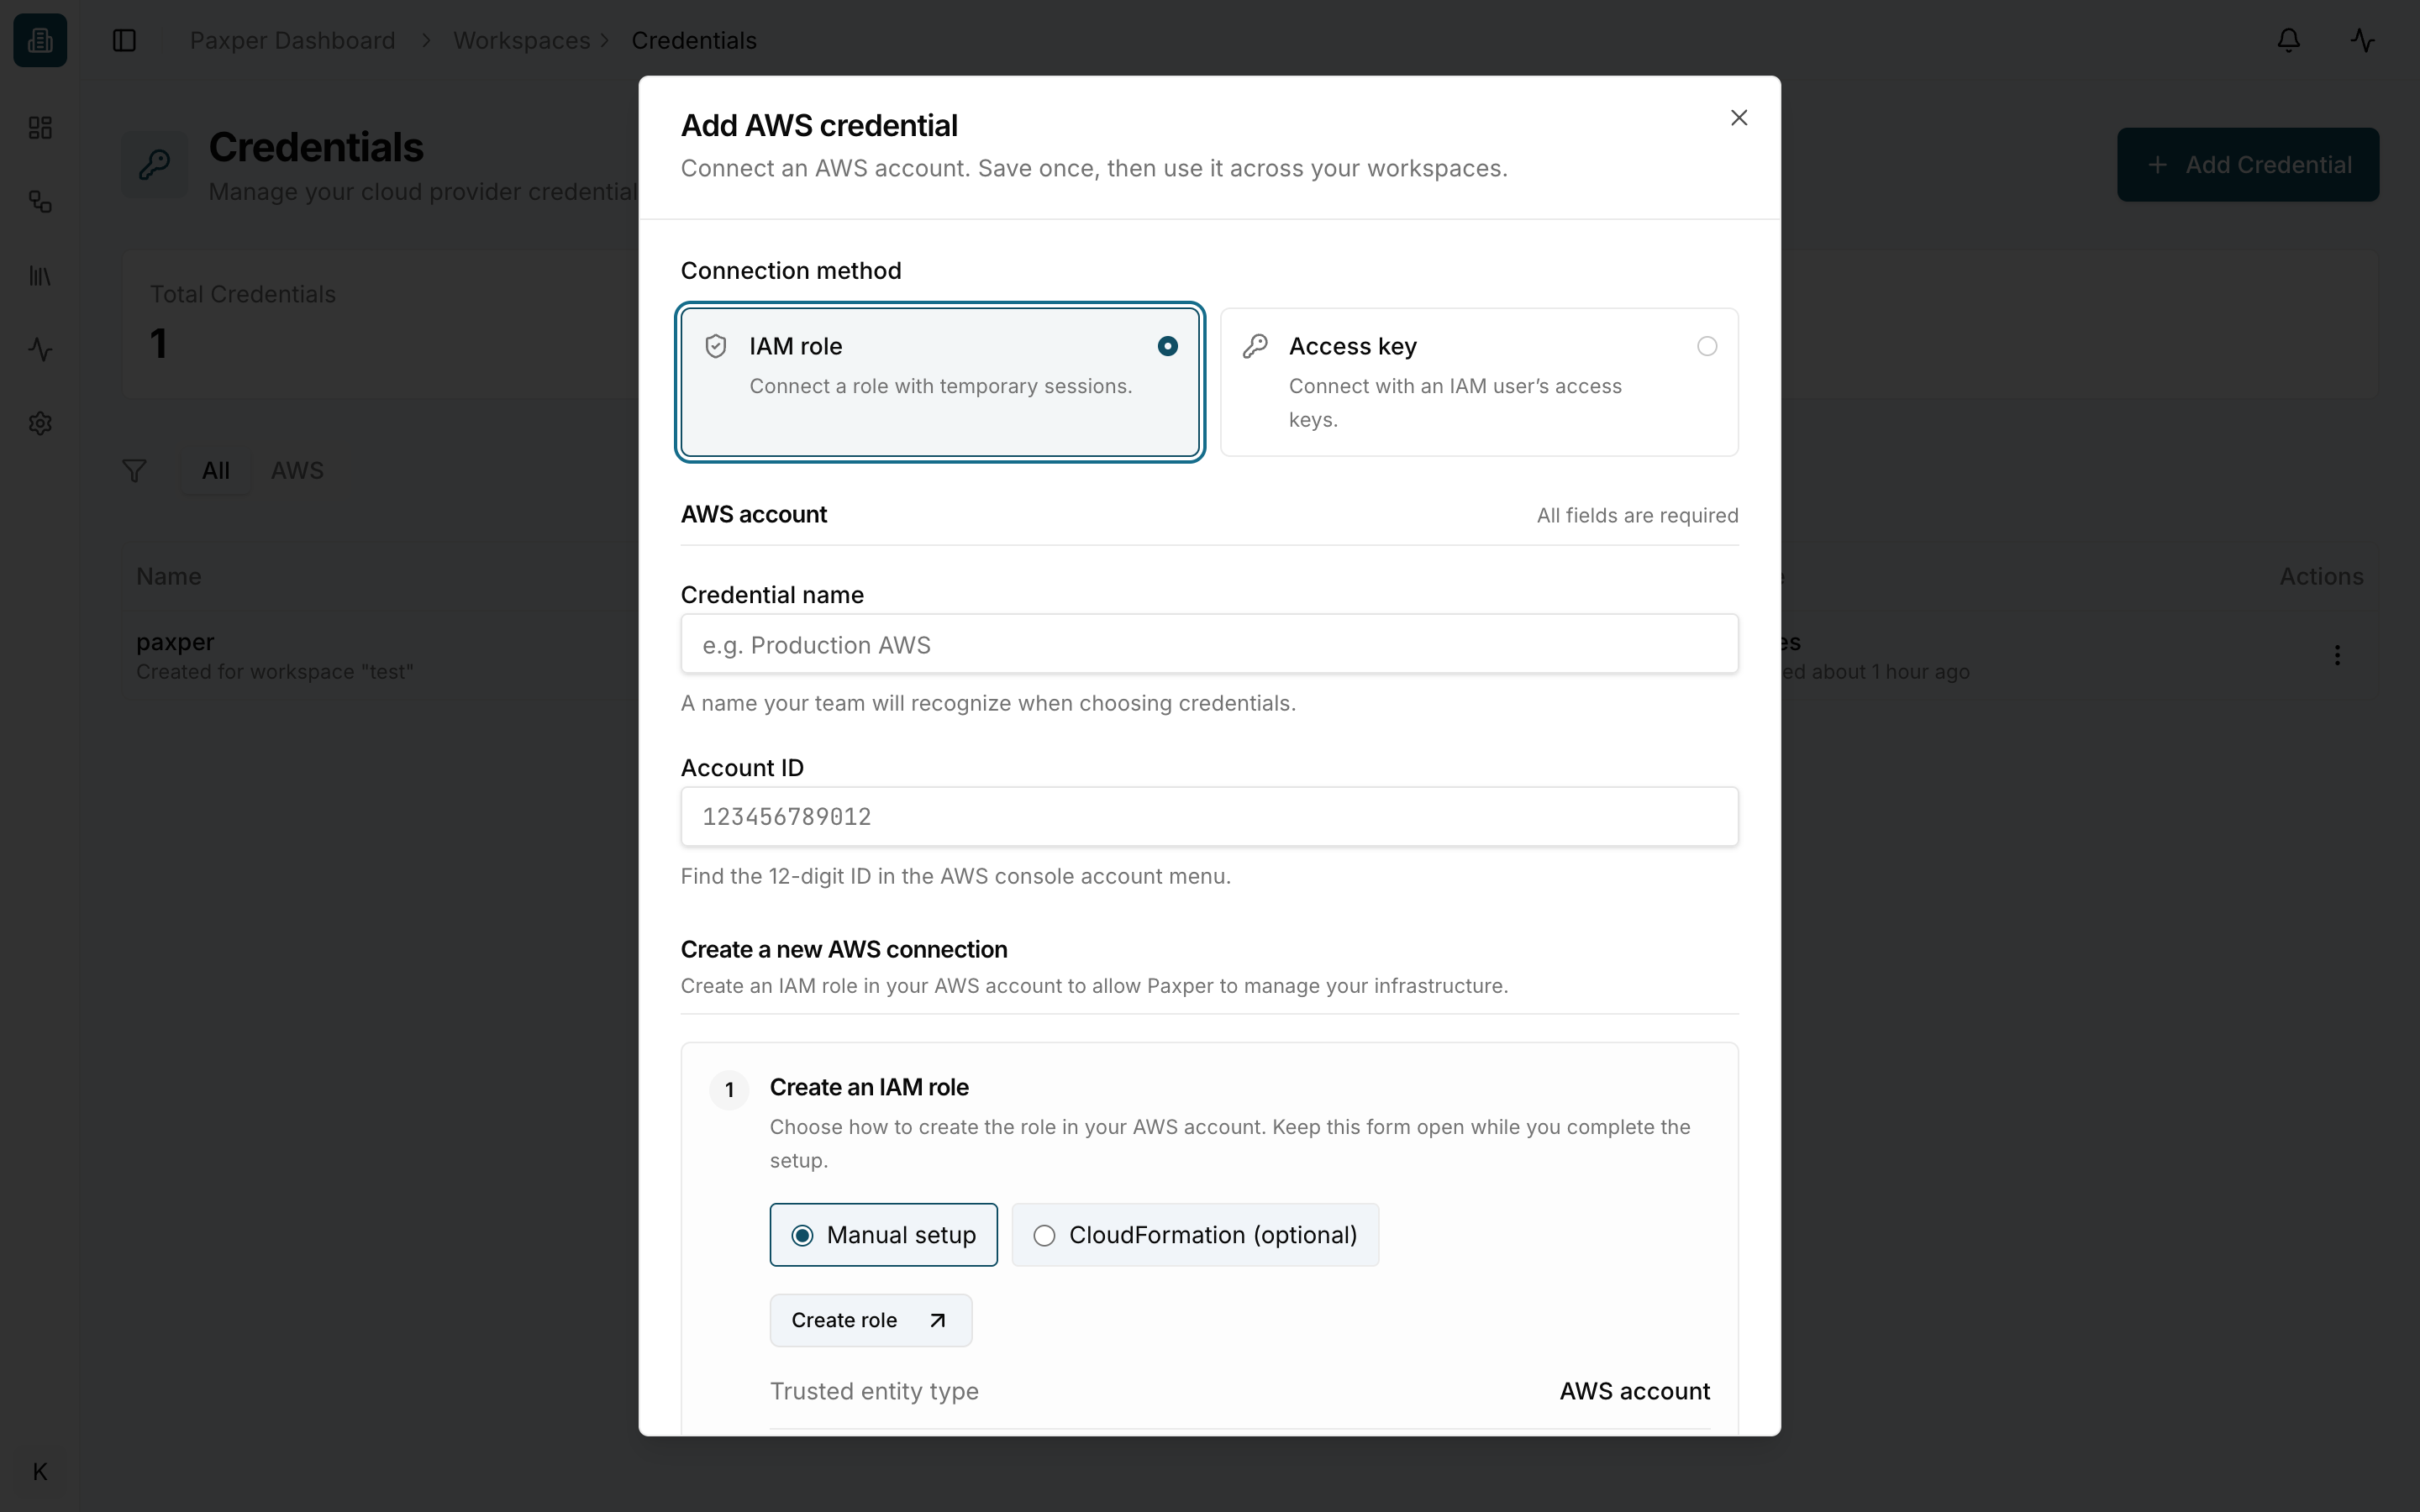
What you should see: your credential in the list with the status active. If it shows Invalid, the message next to it tells you why. See Why doesn’t my credential work?
More details: Add an AWS credential explains the IAM role and access key options, and Credentials covers managing them later.
Step 2: Create a workspace
- Go to Workspaces → All Workspaces and click New Workspace.
- Workspace Setup: enter a name, for example
my-first-workspace, and choose Development. - Cloud Provider: choose Amazon Web Services.
- Region: choose the region closest to you, for example
eu-central-1. - Cloud Connection: under Use Existing, pick the credential from step 1 and click Use credential.
- Review: click Create workspace.
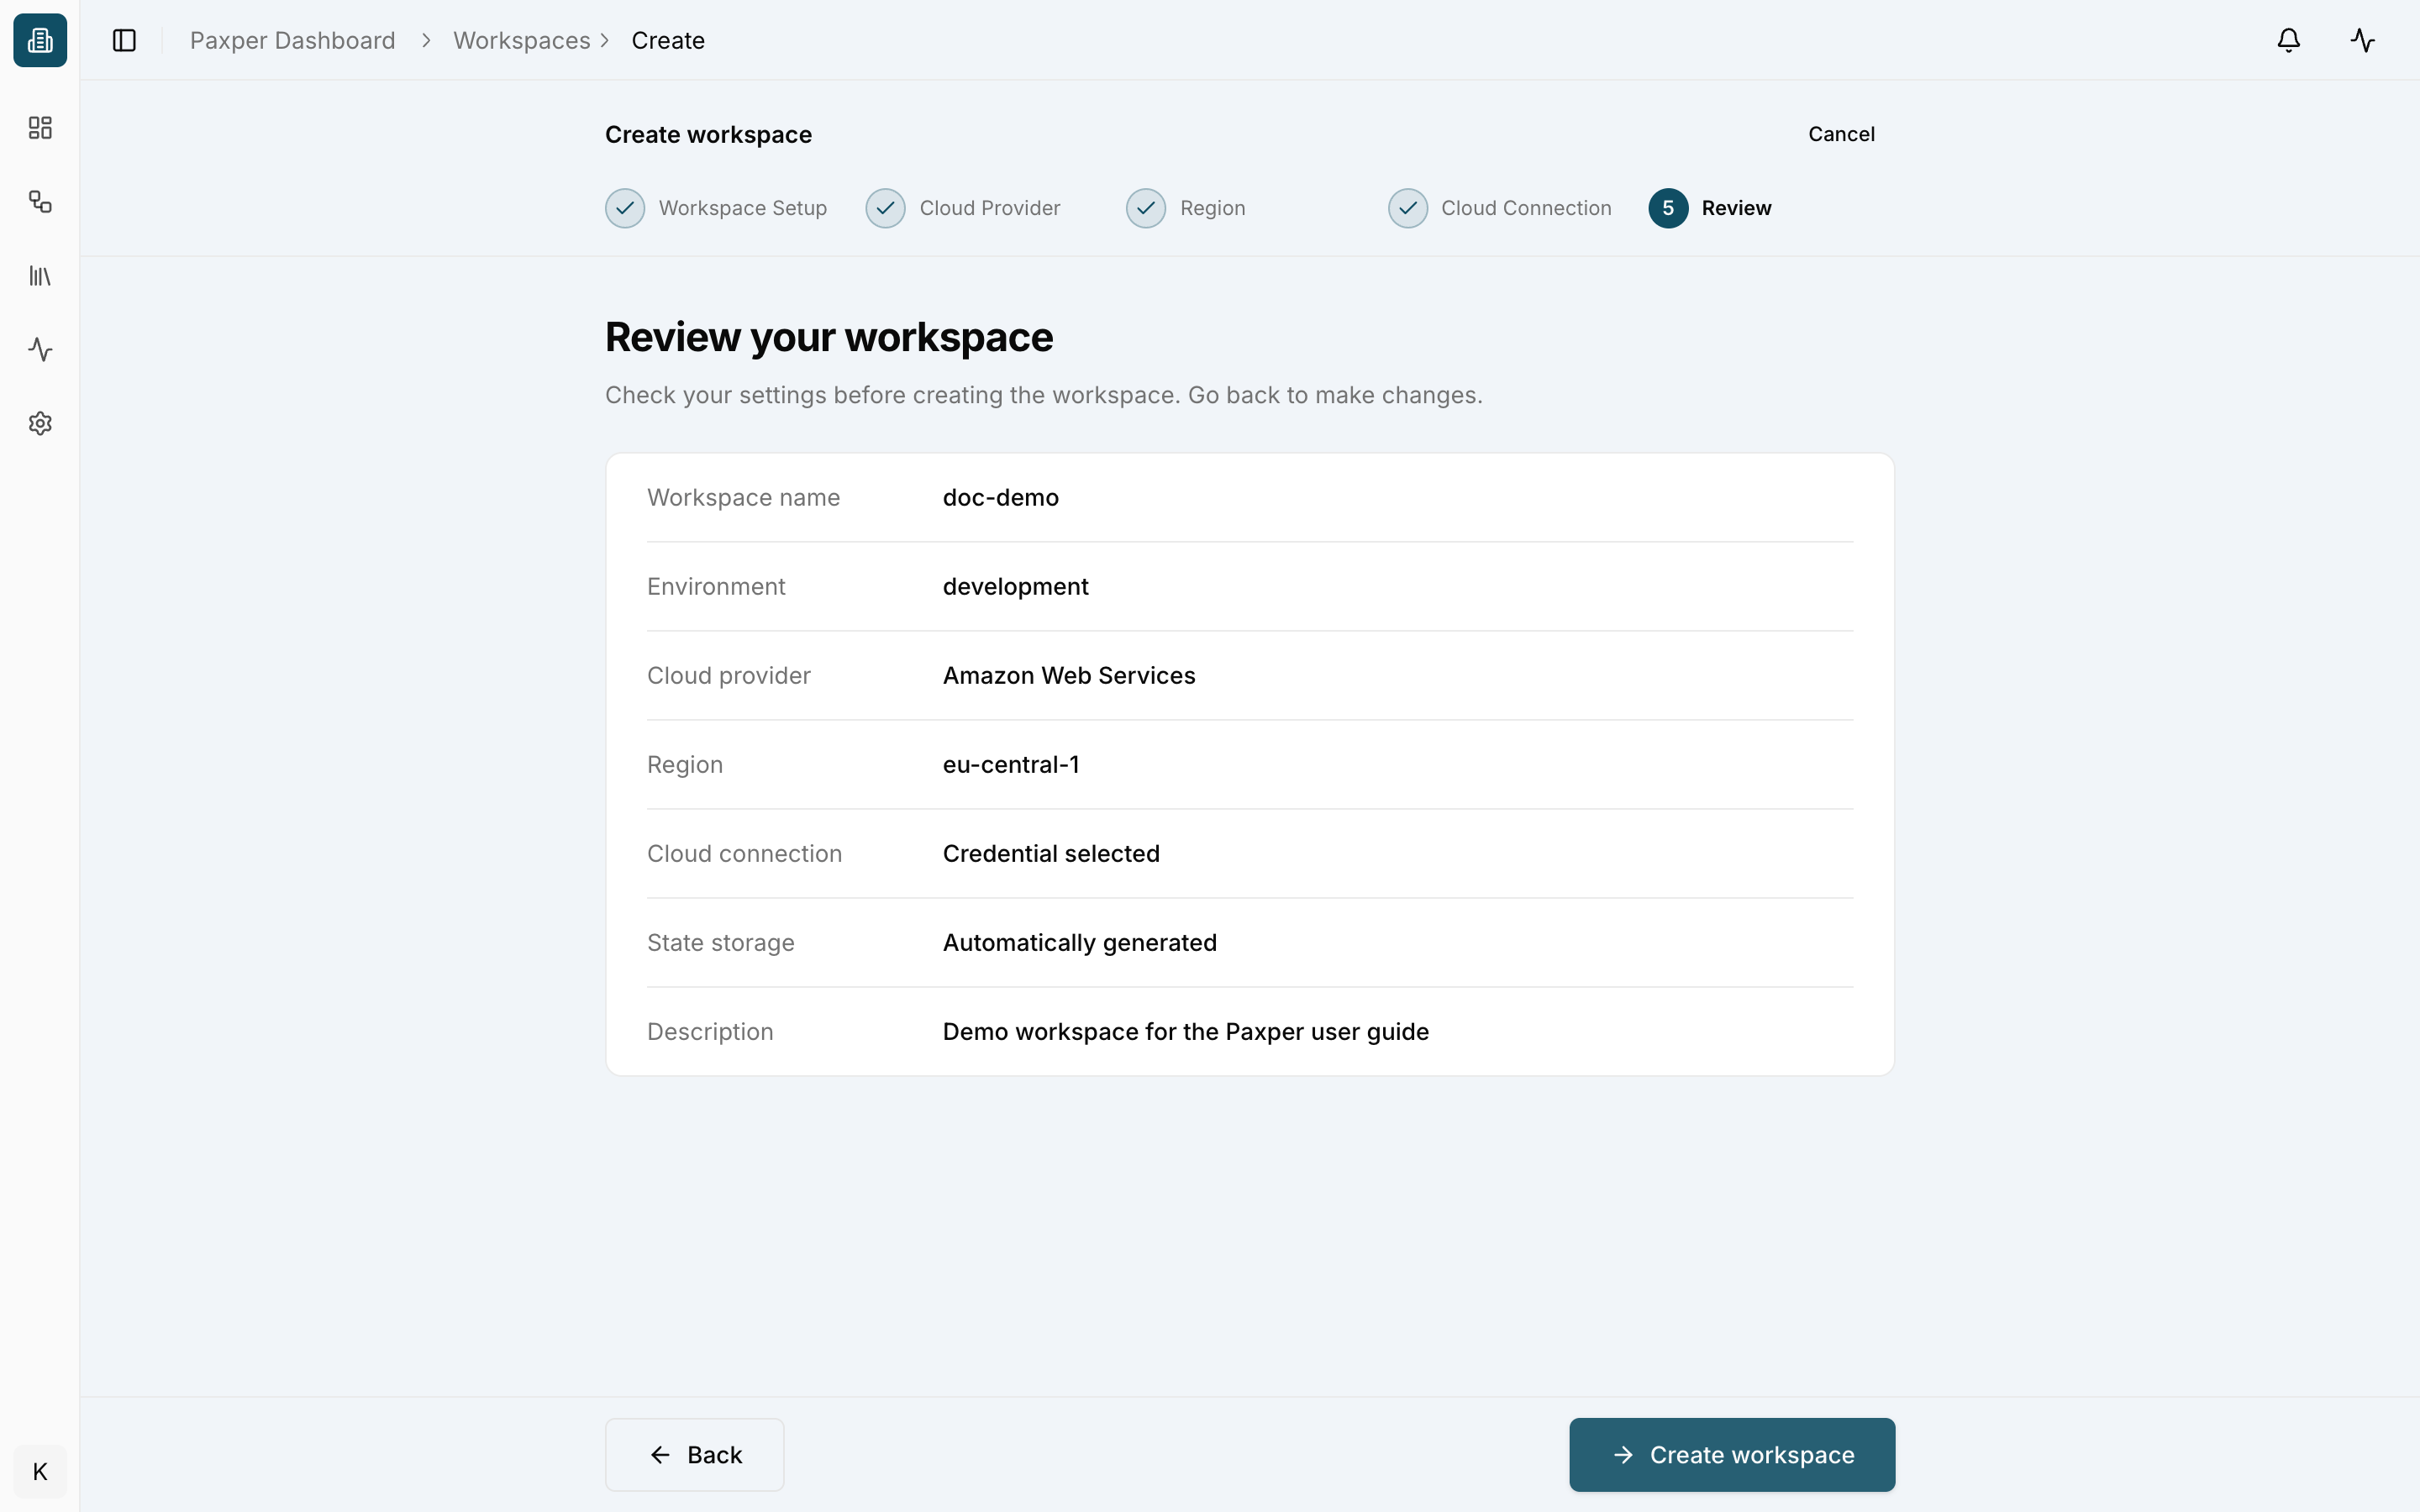
What you should see: the new workspace opens on the Diagram tab with an empty canvas.
Each field is explained in How to Create a Workspace, with Workspace Setup and Cloud Connection as the most common places to get stuck. Prefer to start from a ready-made design? See Templates and come back to step 3 later.
Step 3: Add a VPC
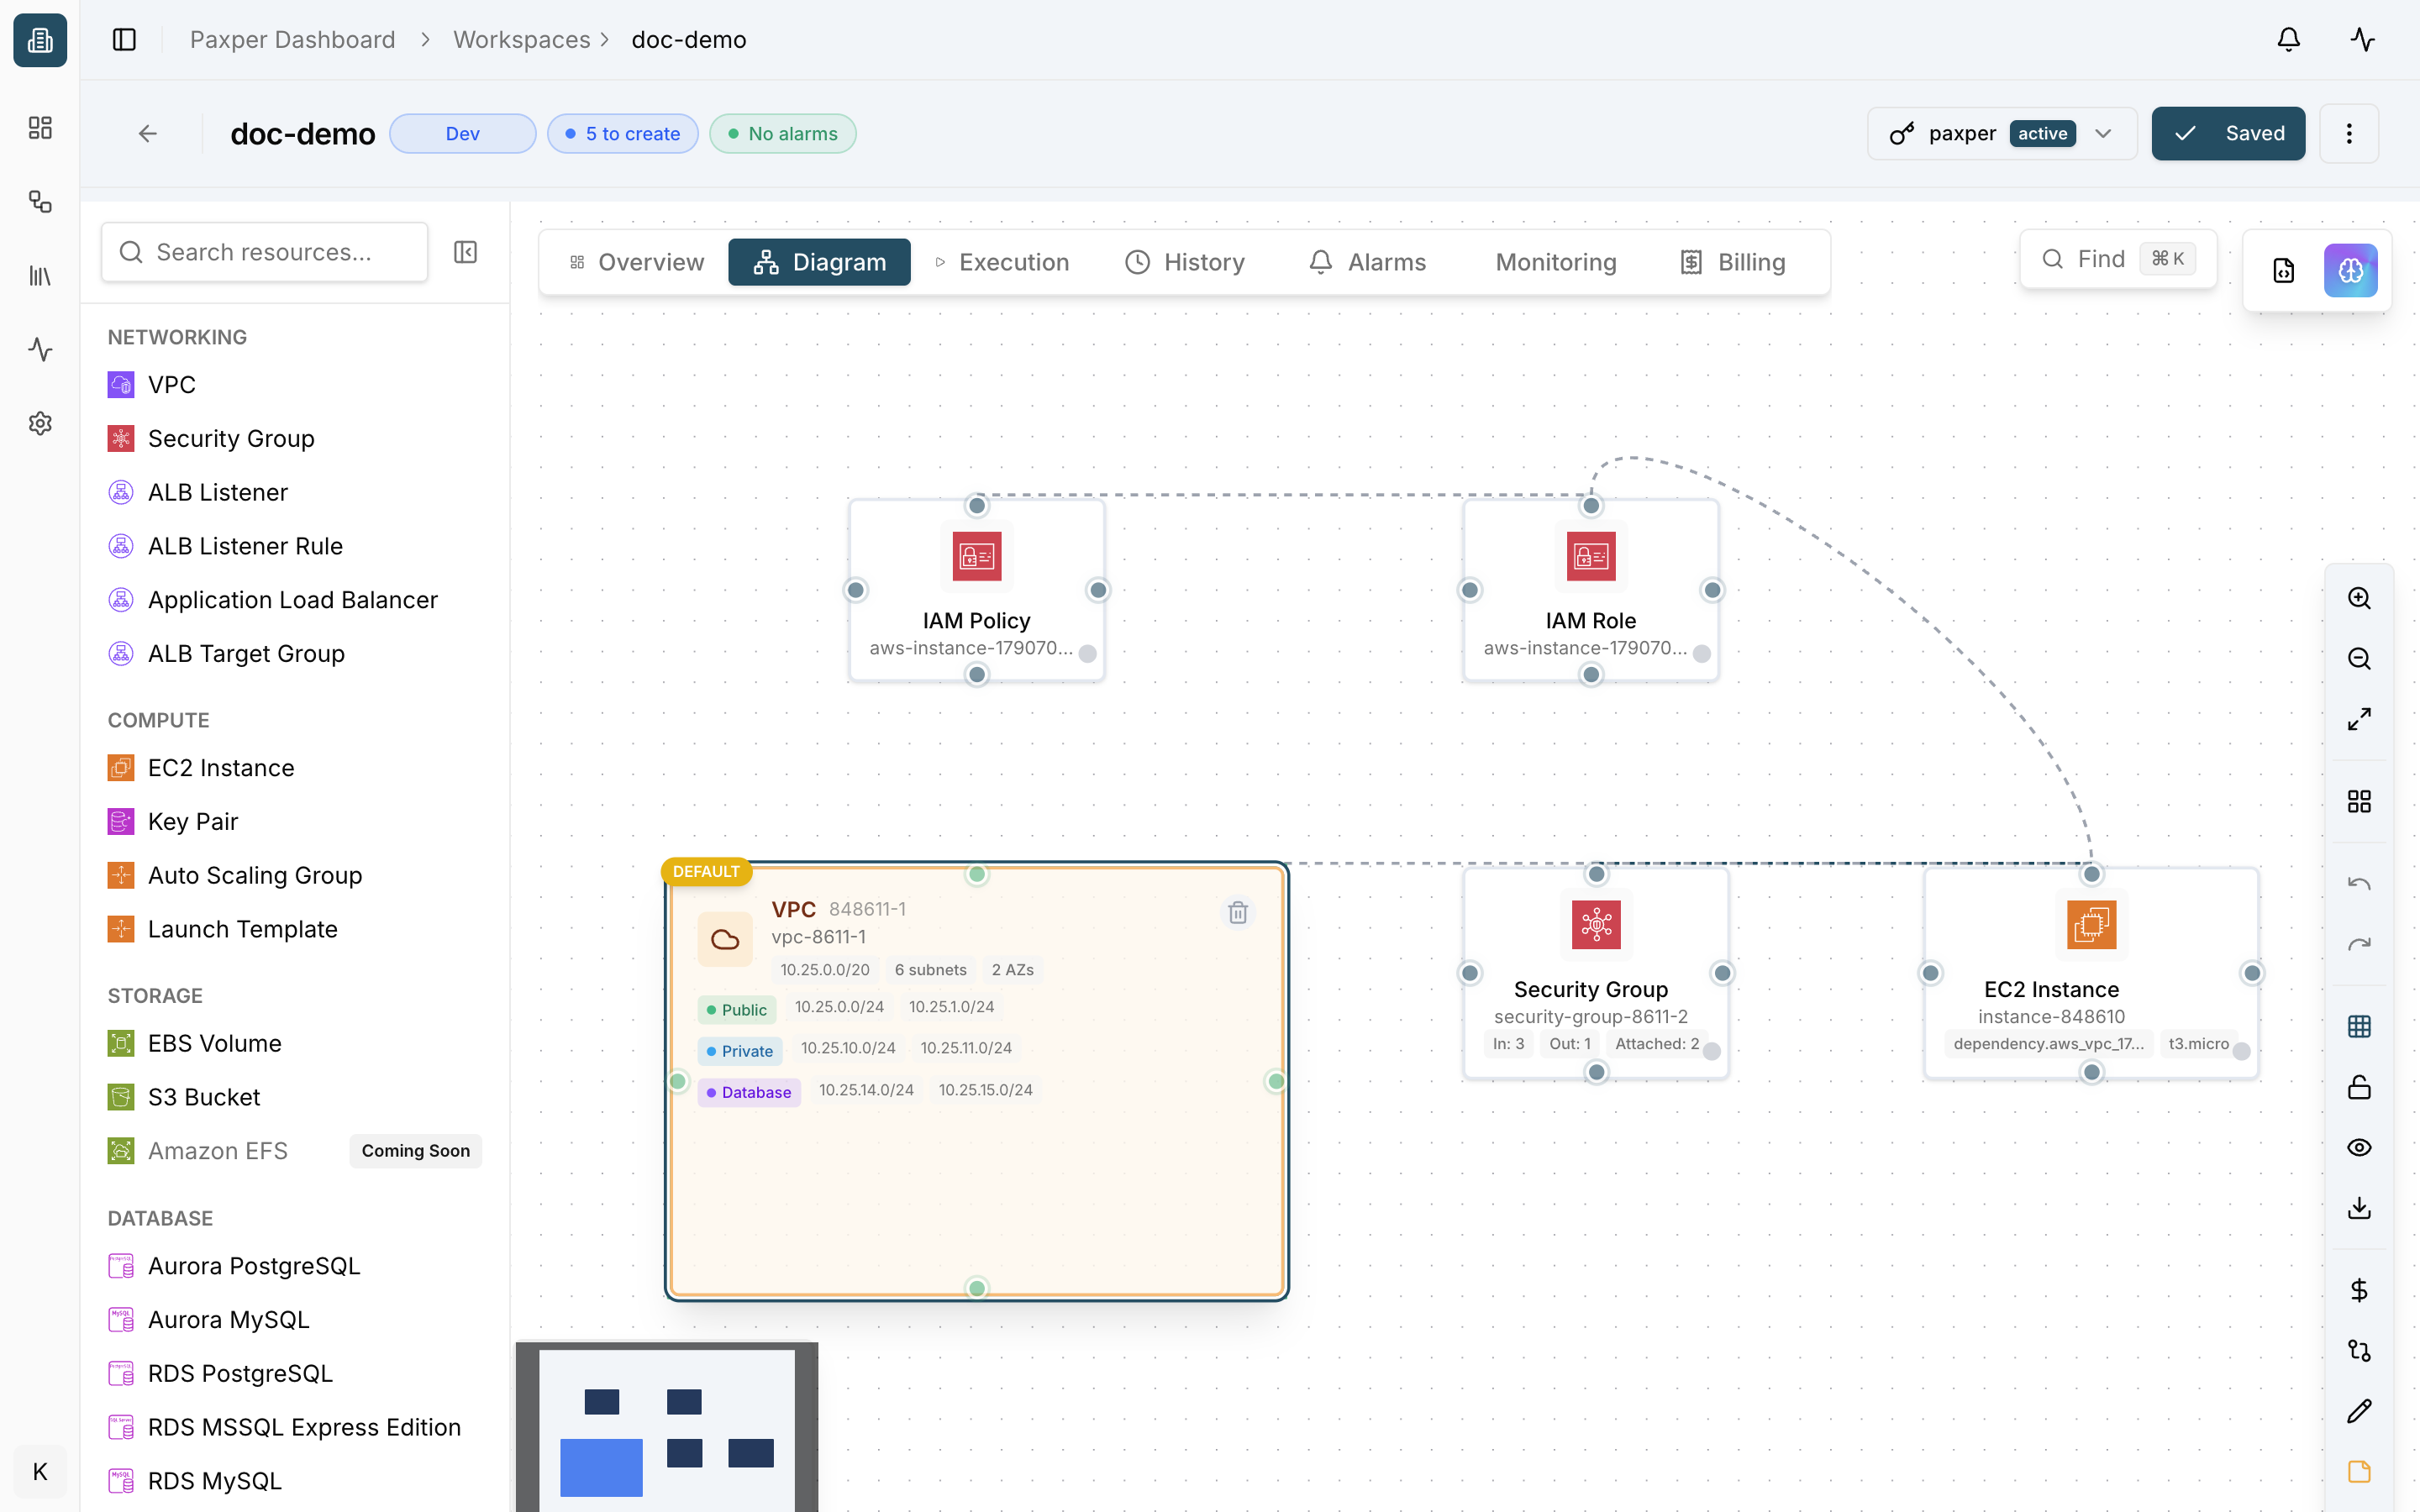
- Add a VPC from the resource panel to the canvas.
- Click the VPC to open its Properties panel.
- Under General, set the Name, for example
first-vpc. - Under Network, turn Enable NAT Gateway off. Leave everything else as it is.
- Click Save Properties.
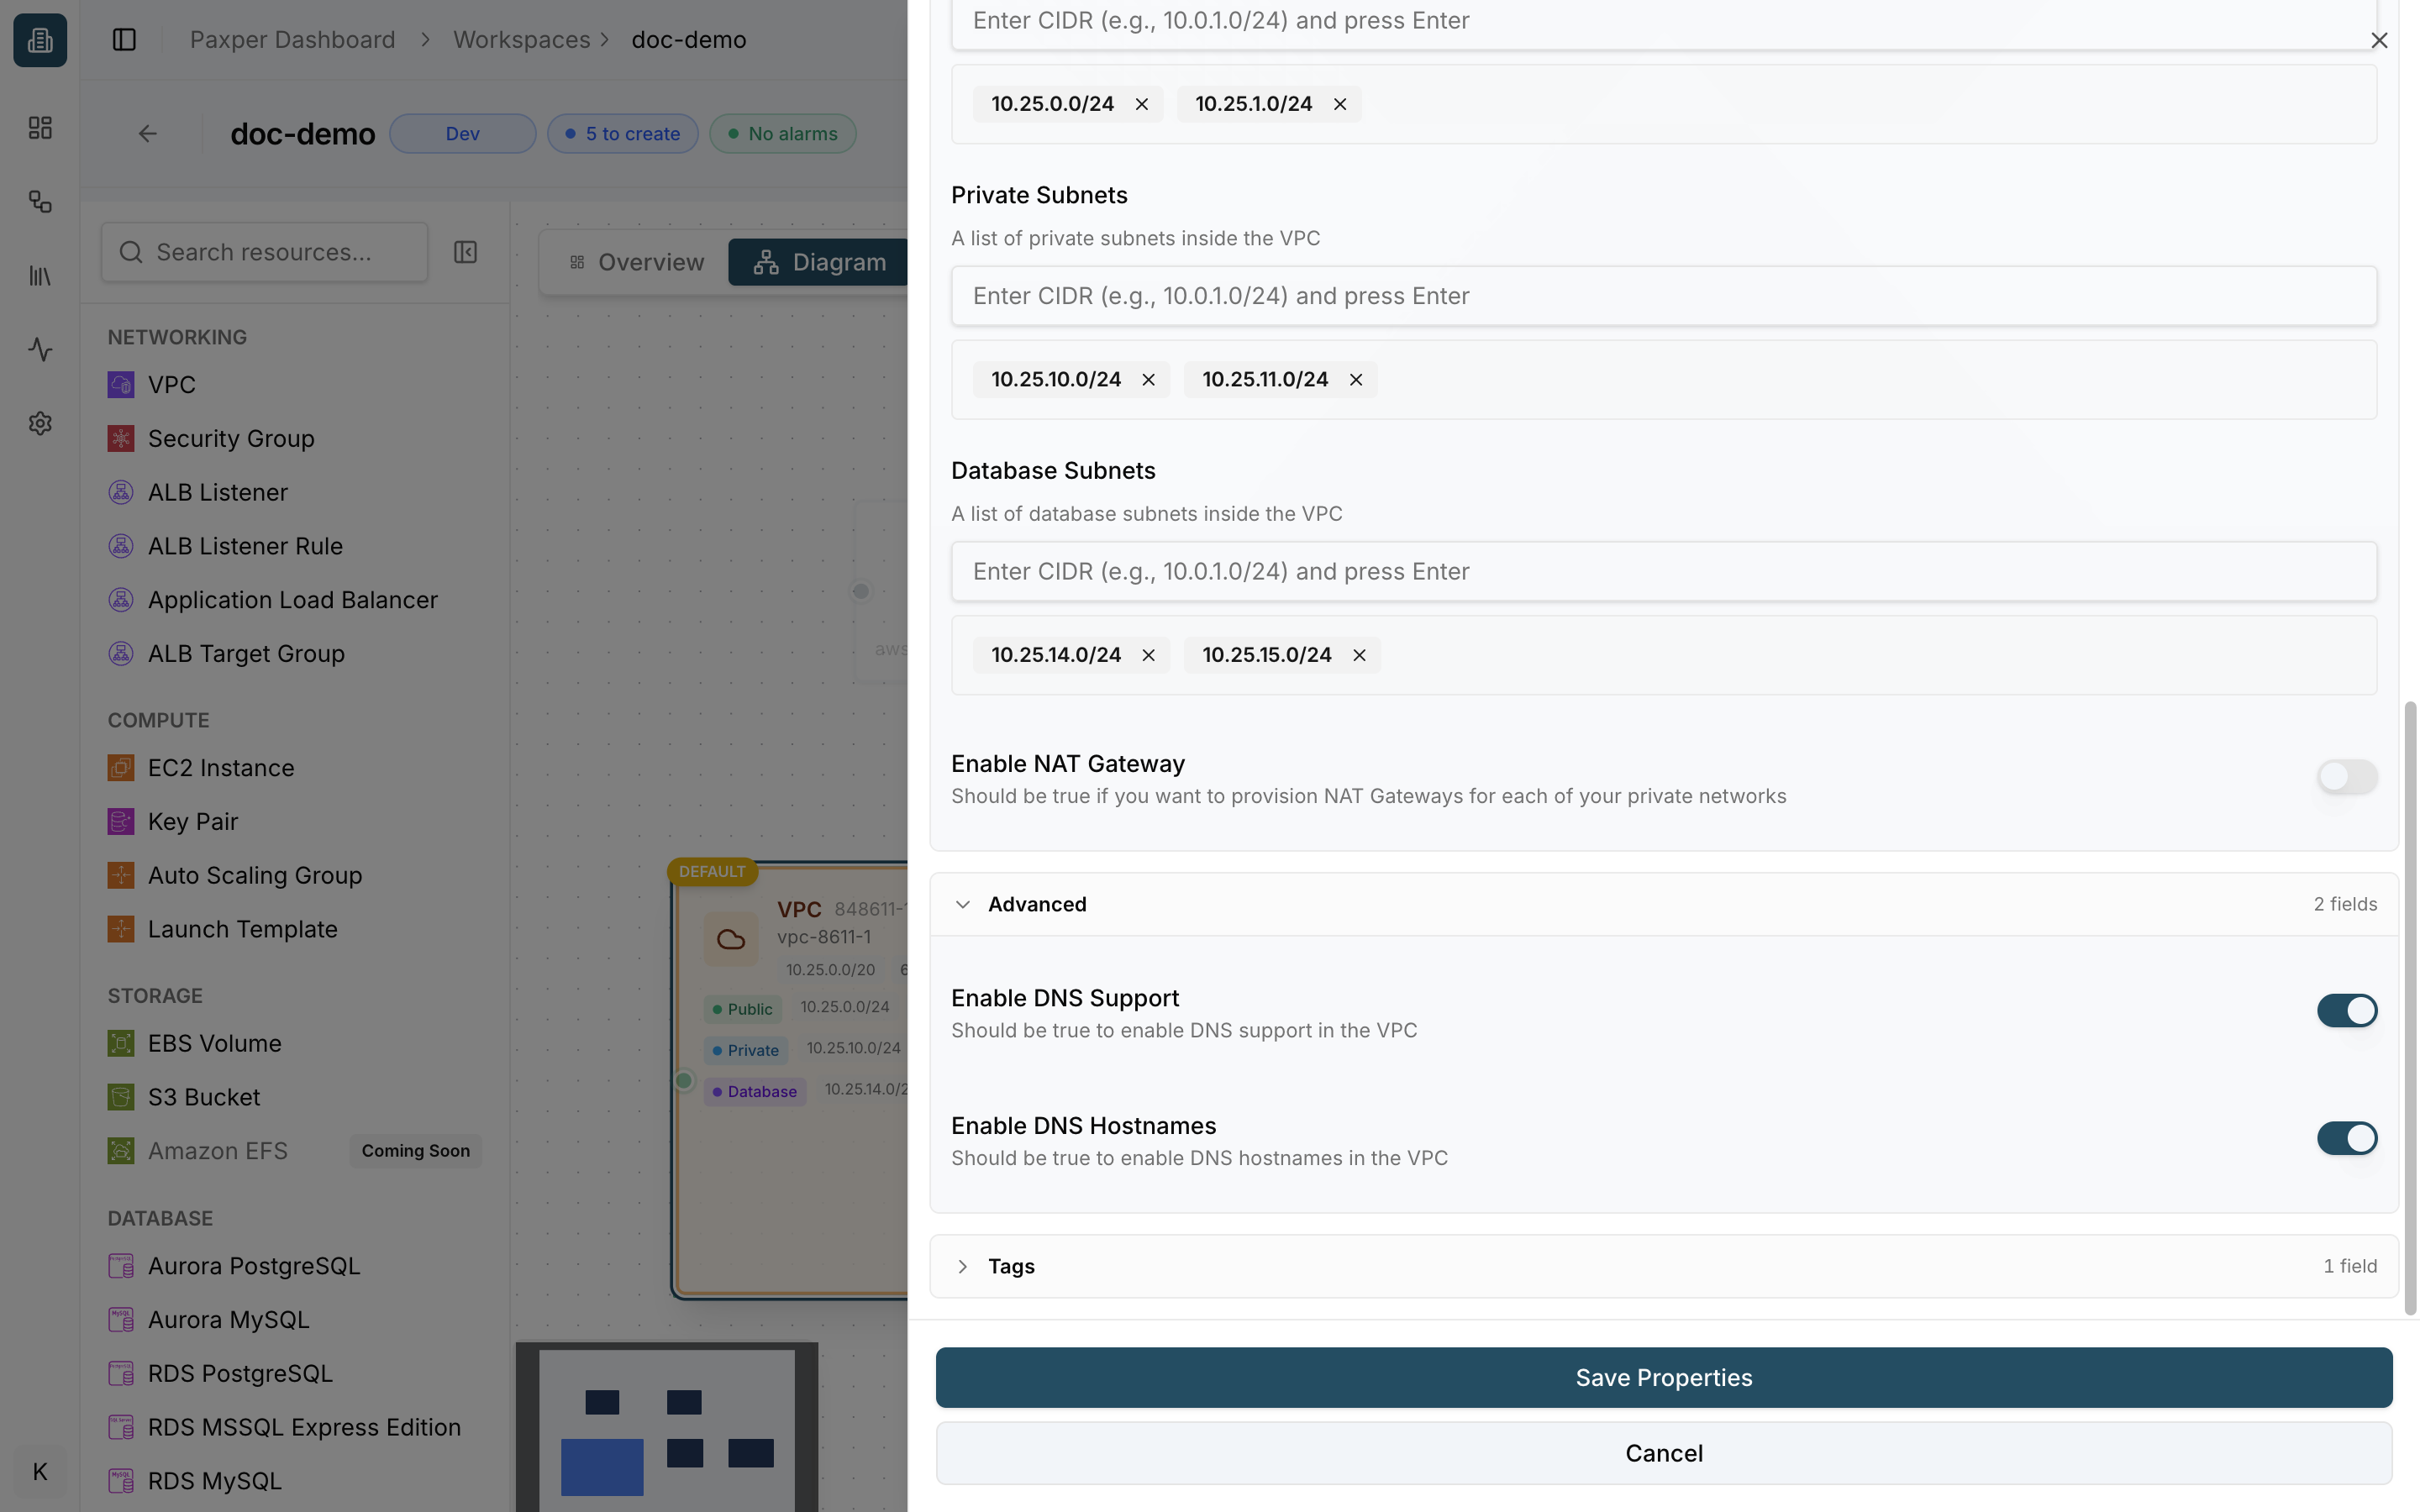
Enable NAT Gateway is on by default, and NAT gateways cost money every hour. Turn it off for this walkthrough.
What you should see: the VPC on the canvas with the status Draft. Draft means it exists only in your design, not yet in AWS.
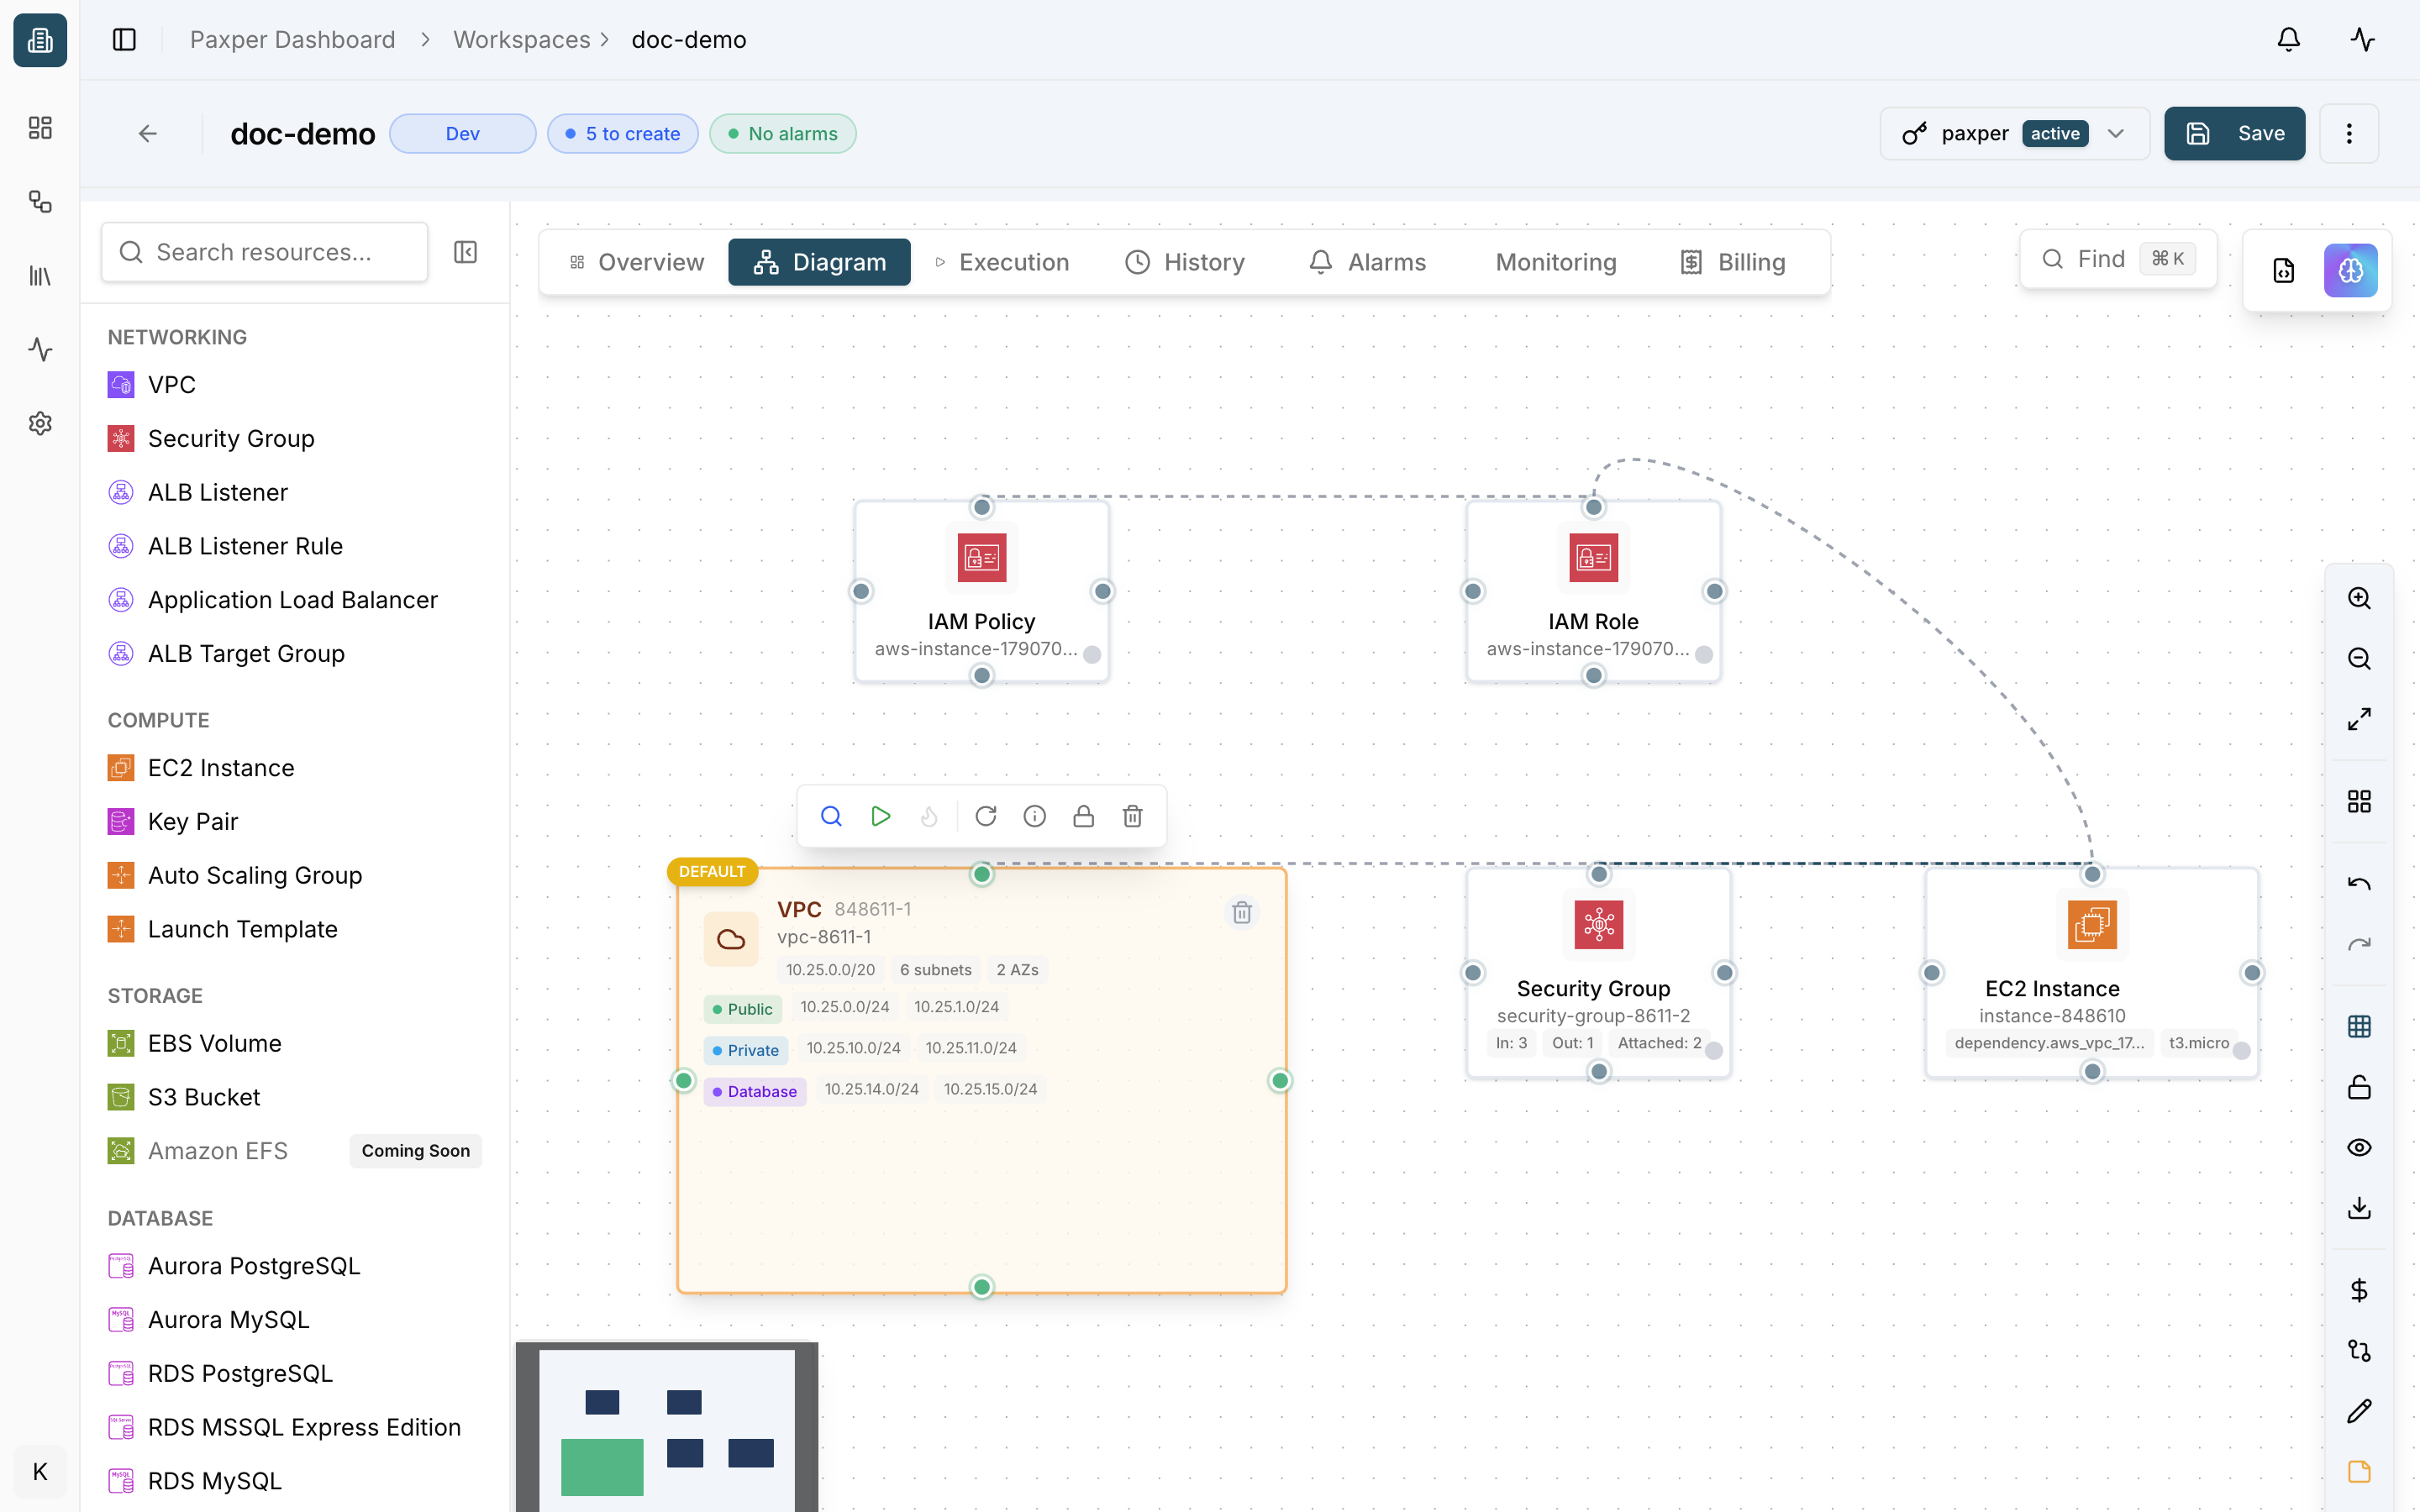
Want to know what each setting does? See AWS VPC Setup.
Step 4: Run a plan
A plan shows what Paxper would create in AWS, without changing anything.
- Hover over the VPC and click the Plan resource icon (magnifying glass).
- In Ready to Plan, click Plan.
- Paxper switches to the Execution tab. Click Console on the job to follow it.
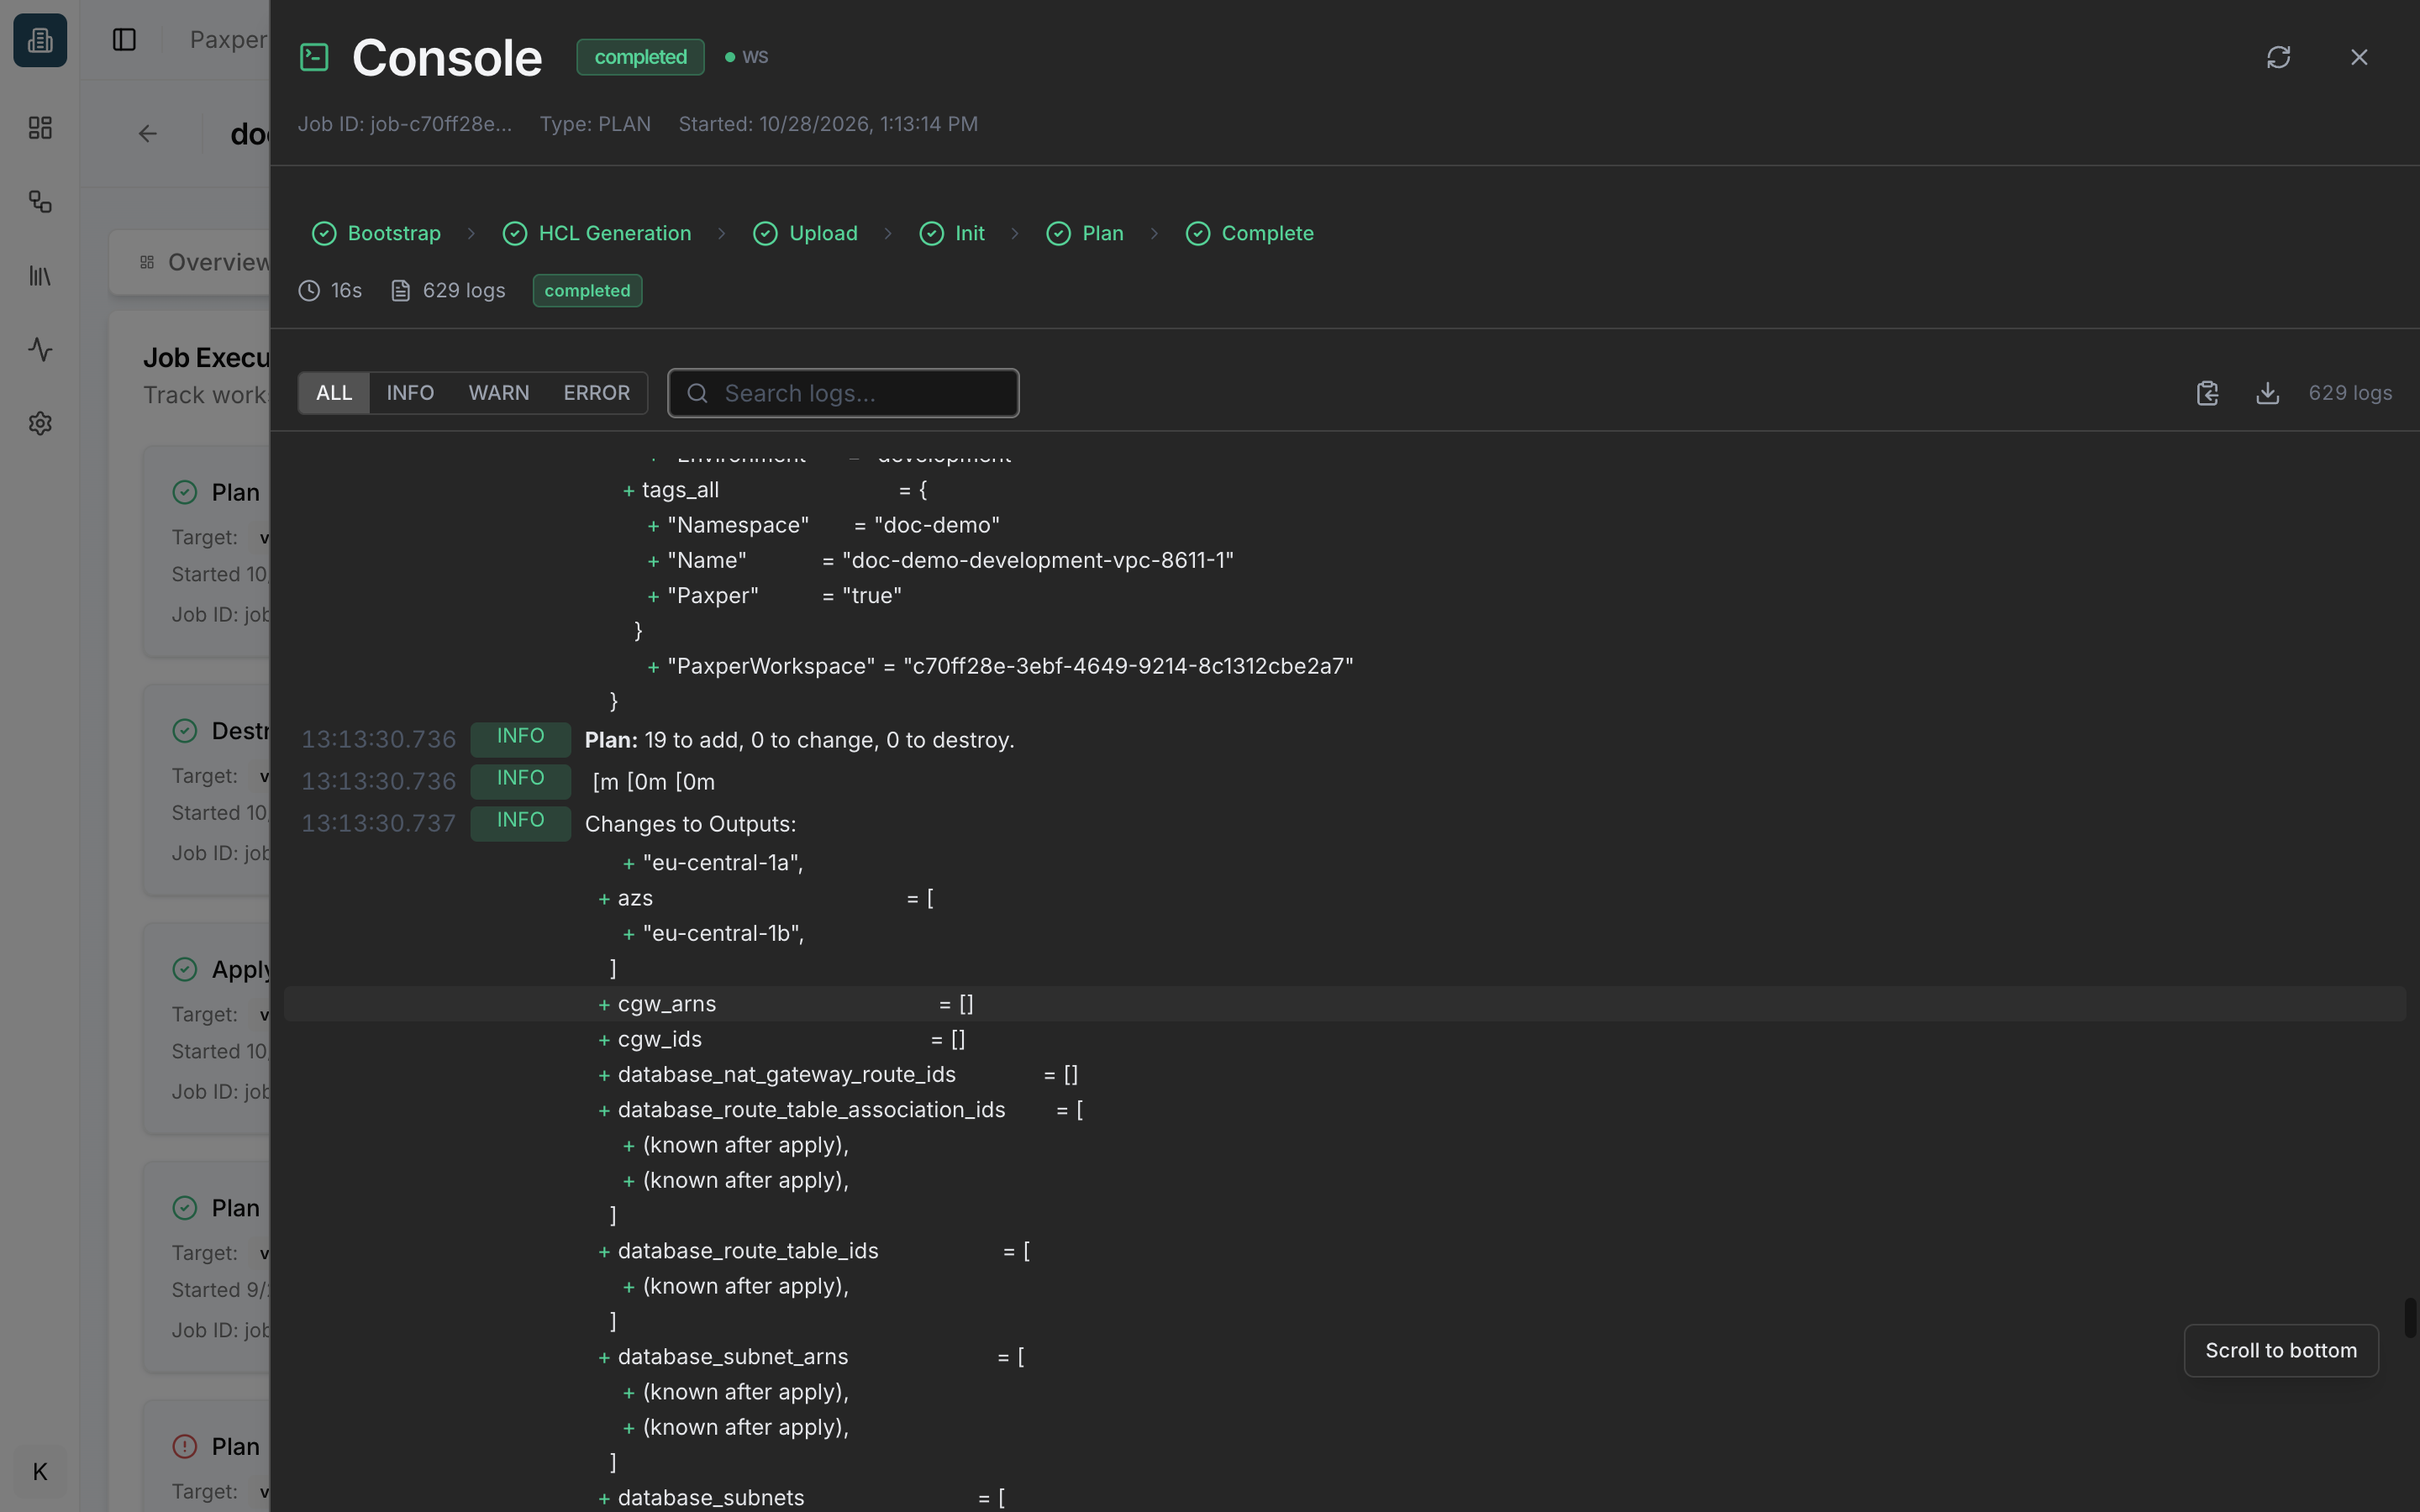
What you should see: the job runs through Bootstrap → HCL Generation → Upload → Init → Plan → Complete and is marked completed. The console lists the resources that would be created (the VPC, its subnets, an internet gateway and route tables) and ends with Plan: 19 to add, 0 to change, 0 to destroy.
If the plan fails, open the console, filter by ERROR, and see When should I retry?
Step 5: Apply it
- Go back to the Diagram tab, hover over the VPC and click the Apply icon (play button).
- In Ready to Apply, click Apply.
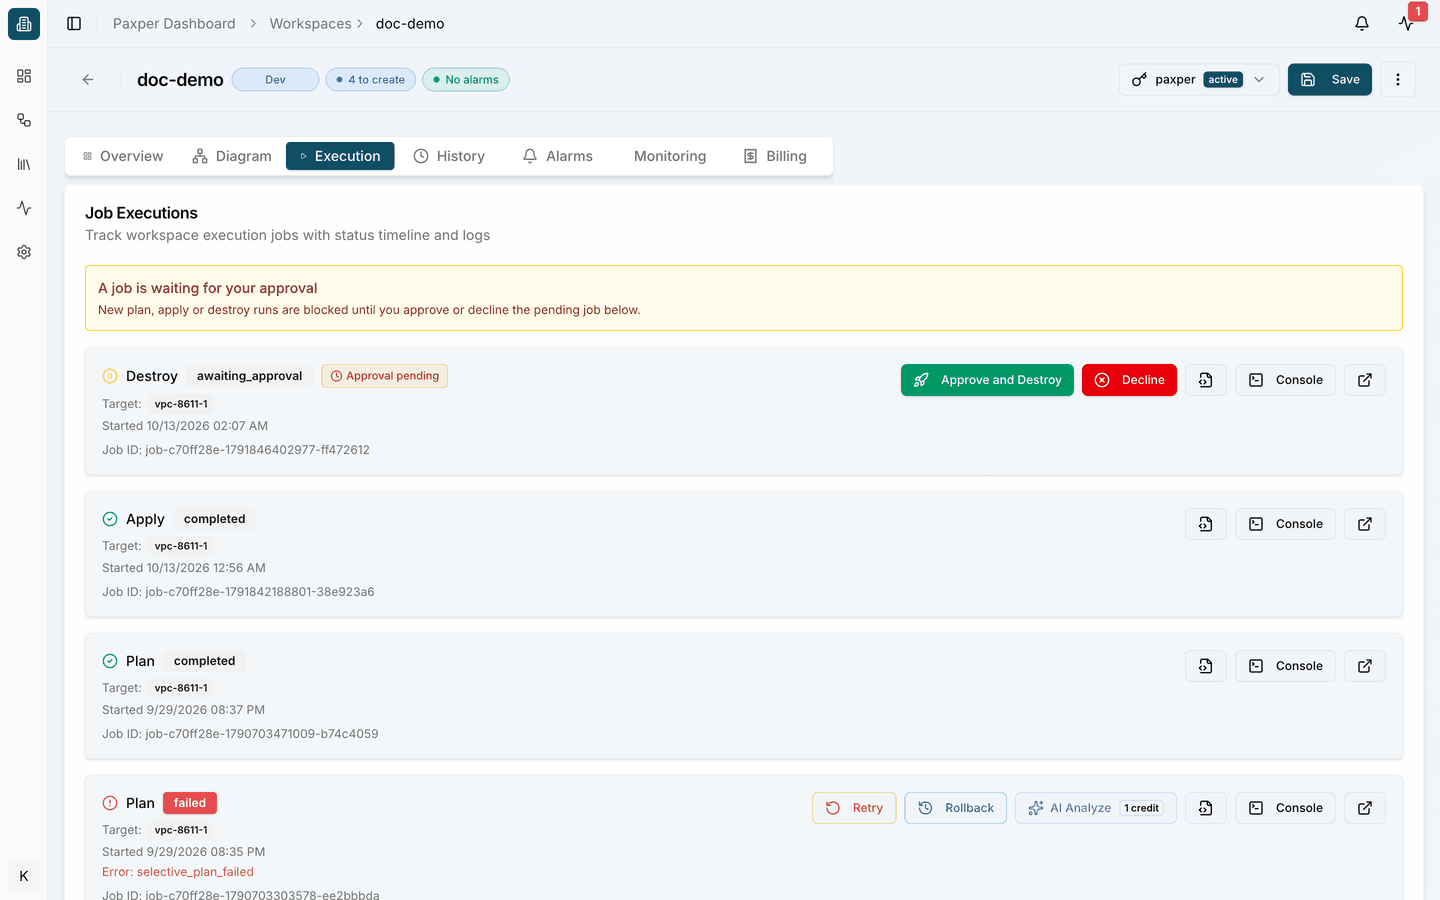
- If your workspace requires approval, the job stops at Approval with the status awaiting_approval. Review the plan in the Console and click Approve & Apply.
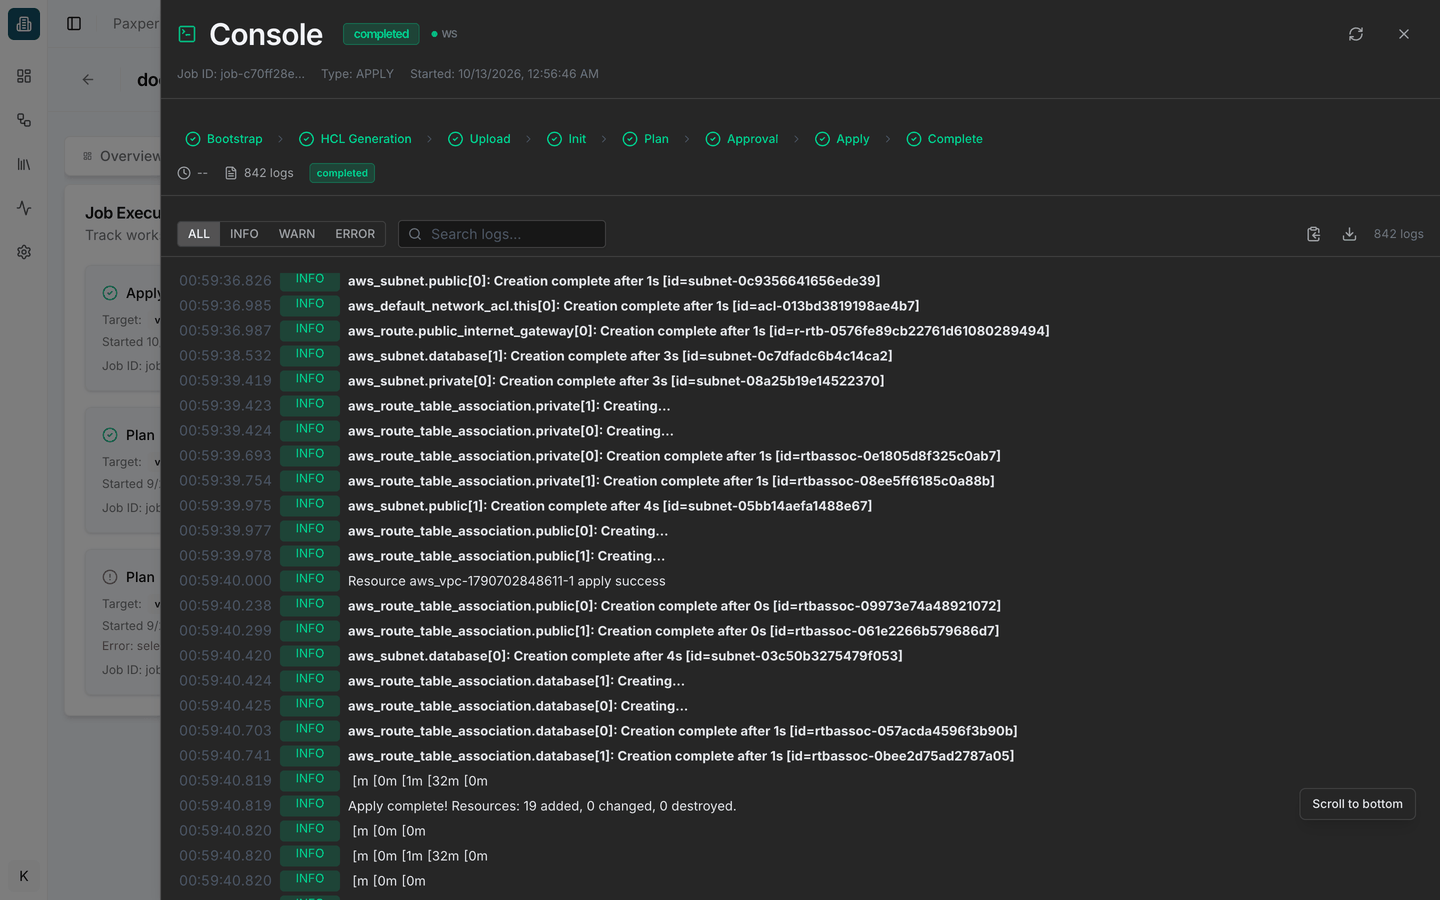
What you should see: the apply job is marked completed, and its console ends with Apply complete! Resources: 19 added, 0 changed, 0 destroyed.
More details: Approvals and Applying and Destroying.
Step 6: Check the result
Your VPC now exists in AWS. Check it in three places:
- Canvas: the VPC has a green check mark, and its Apply tooltip says Already Applied.
- Overview tab: Workspace Status shows the time of the last run, and the state lock is Unlocked again.
- AWS console: open VPC → Your VPCs in the region you chose. Your VPC is listed under the name you gave it.
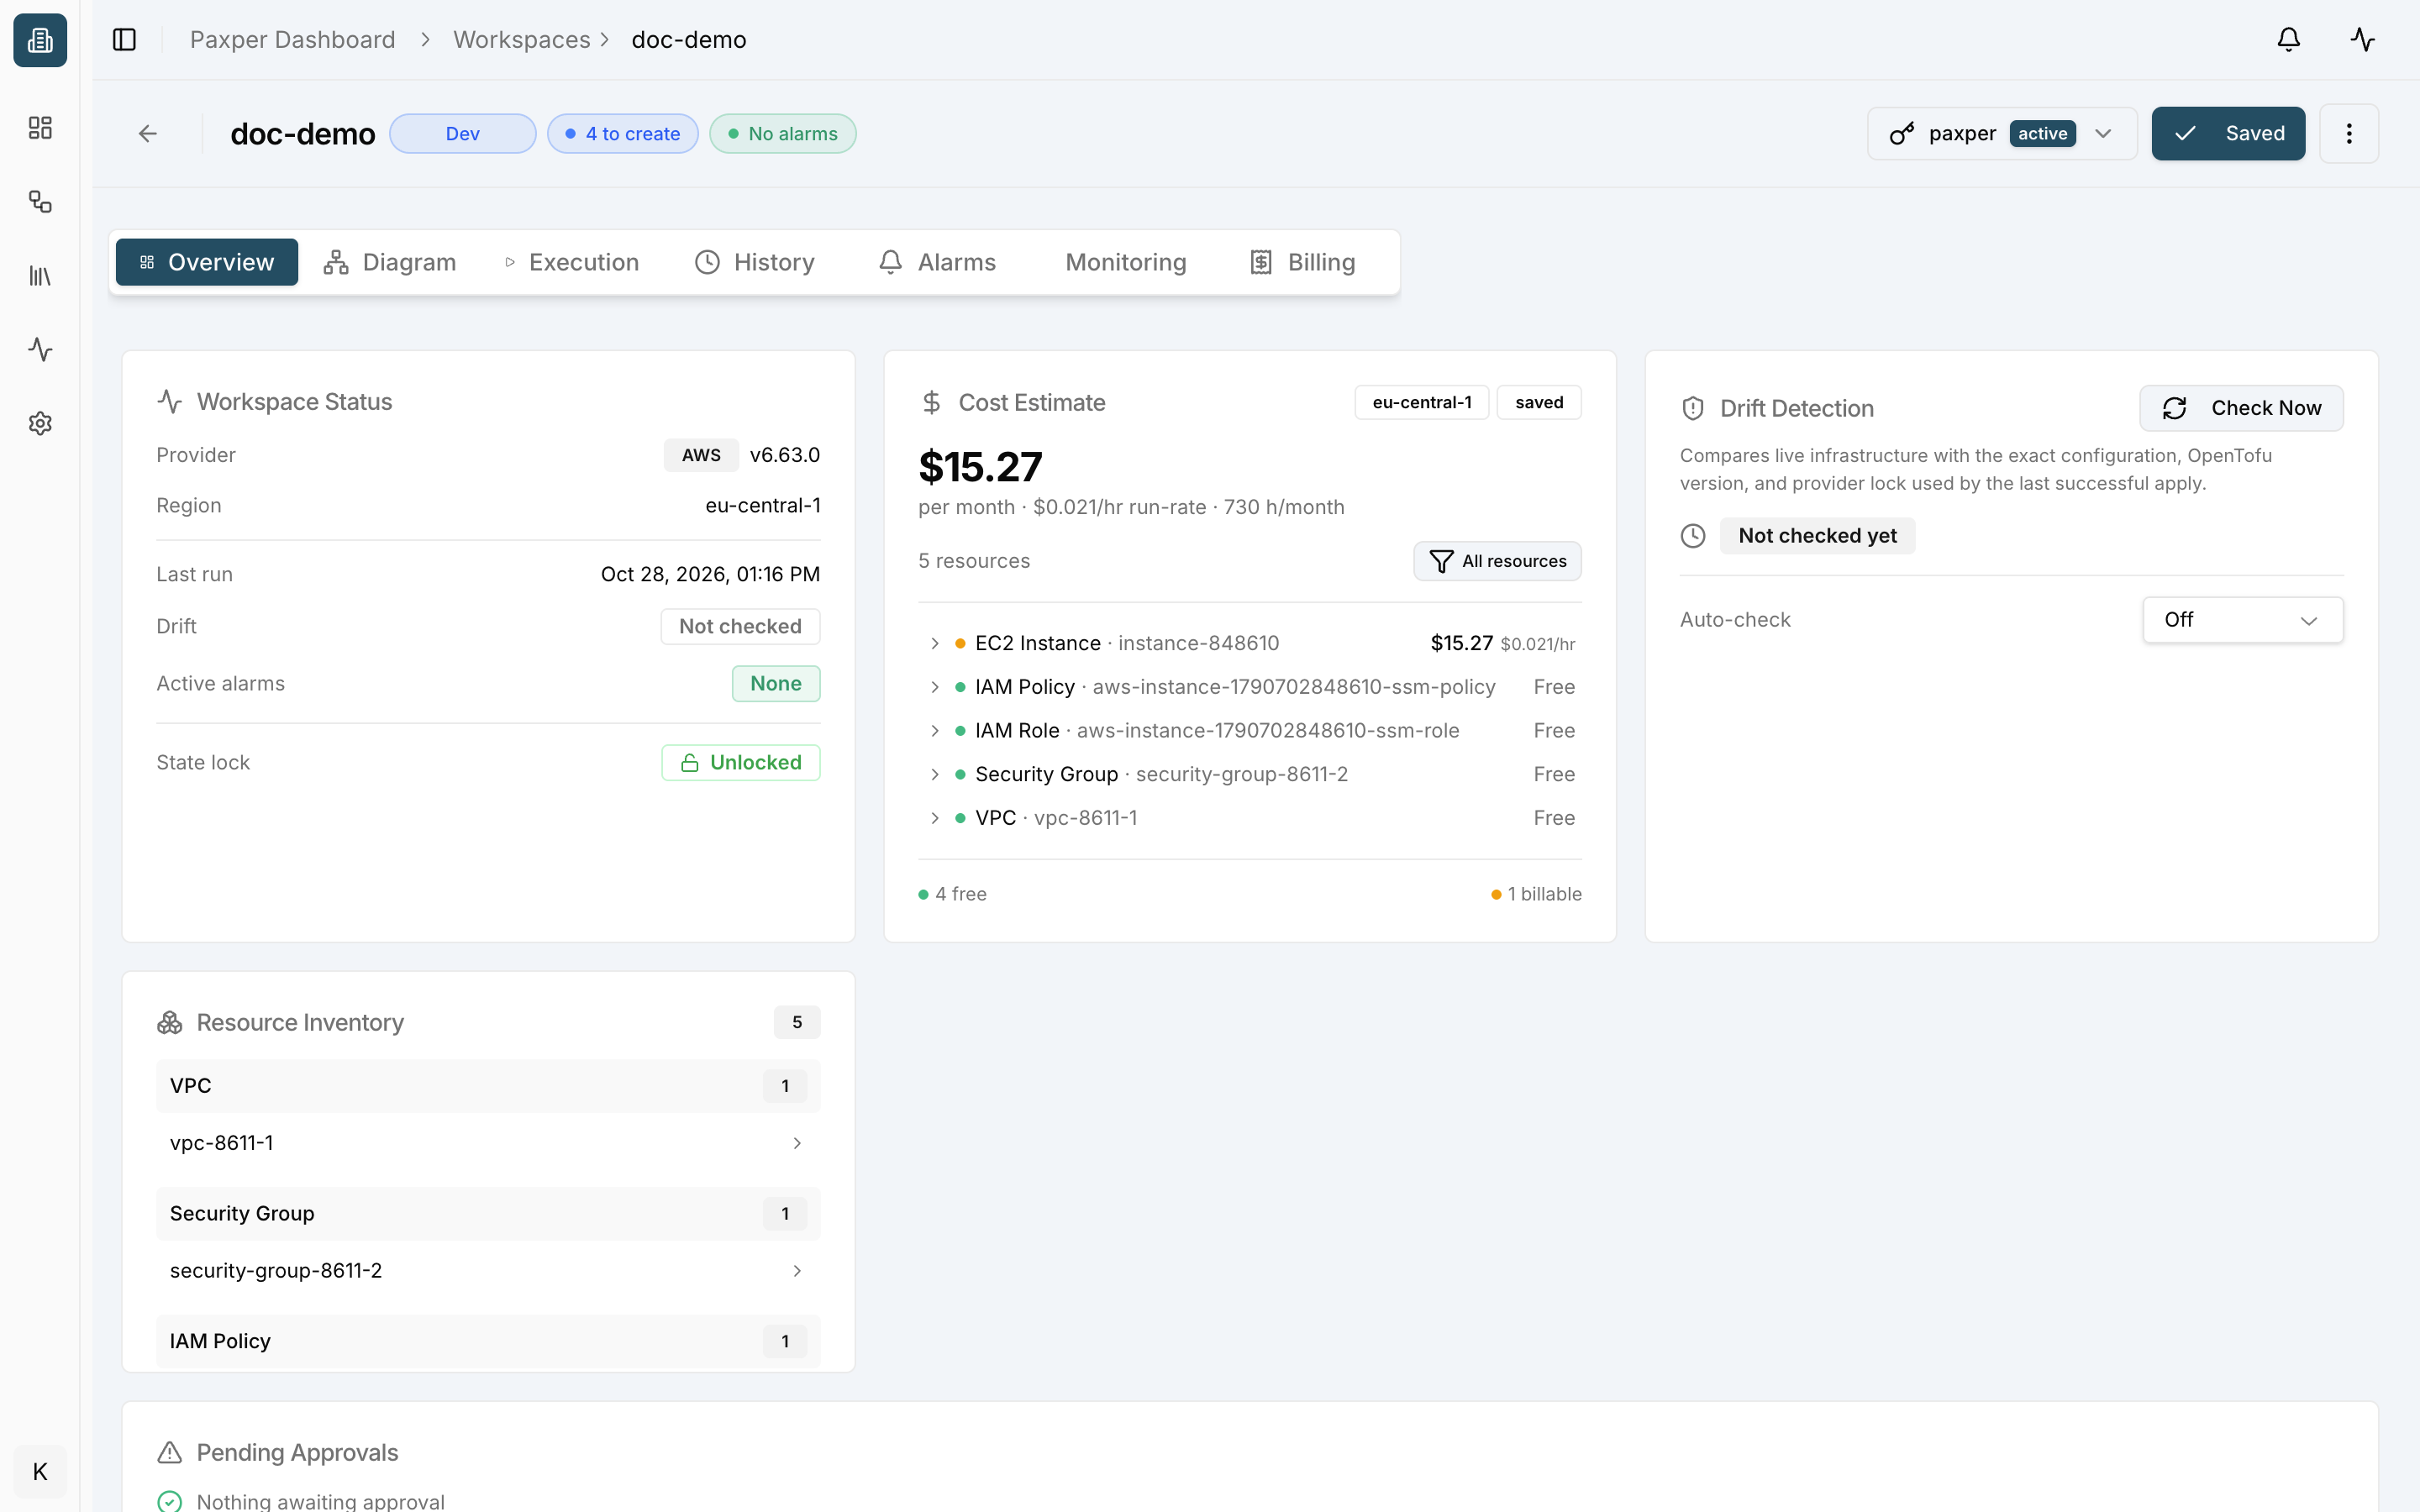
What you should see: the same VPC in Paxper and in the AWS console. The VPC’s History tab in the Properties panel lists the plan and the apply.
Step 7: Clean up
When you’re done, remove the VPC from AWS:
- Hover over the VPC and click the Destroy icon (flame).
- Confirm with Destroy.
- If your workspace requires approval, click Approve and Destroy.
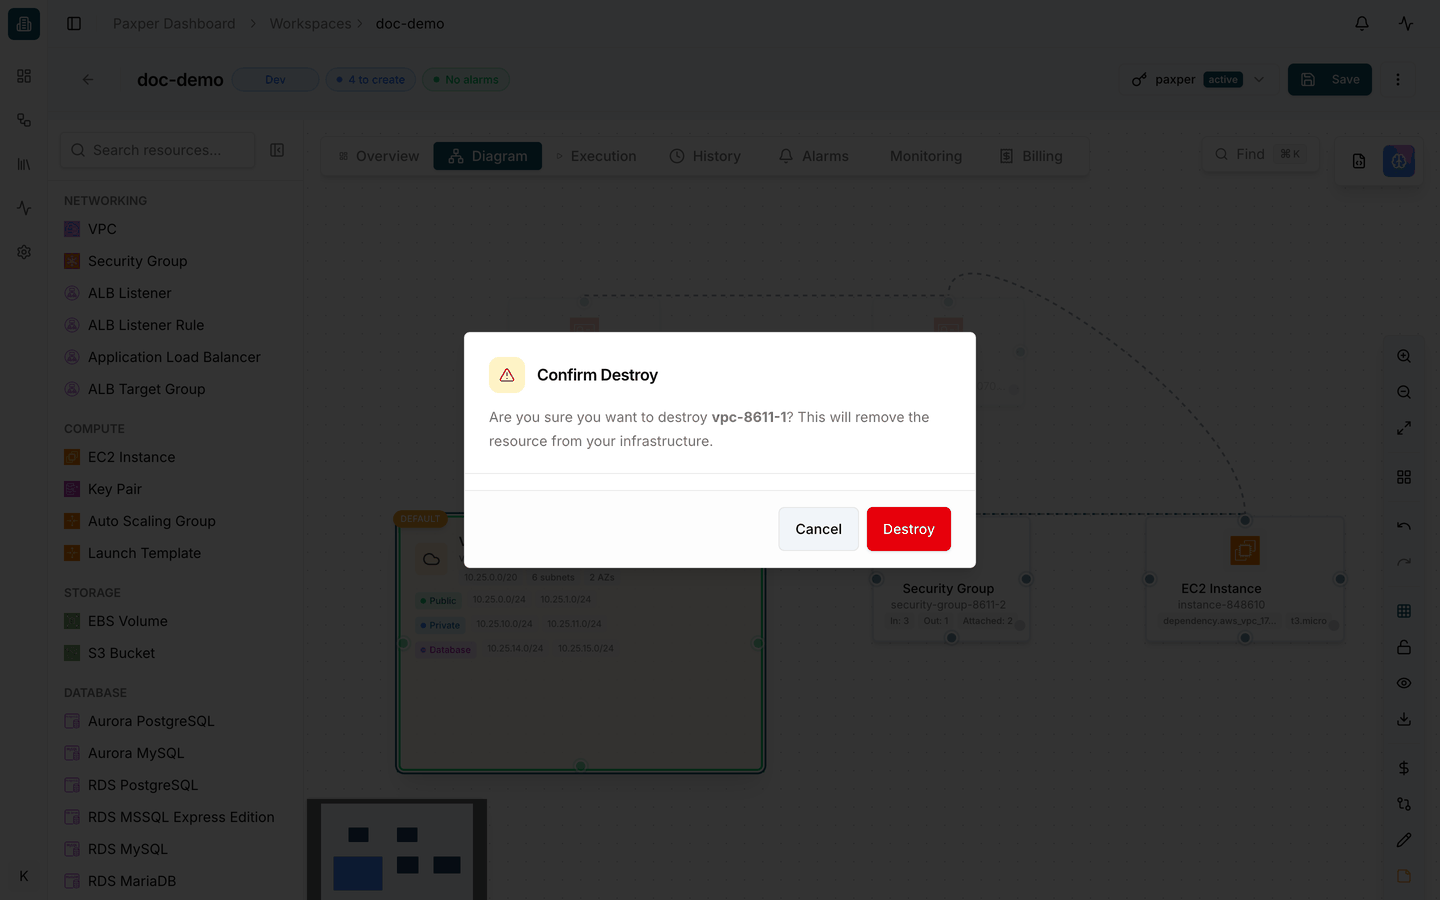
What you should see: the destroy job is marked completed with 19 destroyed. The VPC stays on your canvas with the status destroyed, so you can apply it again later. In the AWS console, the VPC is gone.
What’s next?
- Start from a ready-made design with Templates.
- Learn the canvas in Designing on the Canvas.
- Make sure every change gets reviewed with Approvals.
- Bookmark Troubleshooting and Recovery for when something doesn’t go as planned.