Roles and Access
Every member of your organization has a role that decides what they can do. You can also limit which workspaces a member can reach and who may use each cloud credential.
Roles
| Role | What it can do |
|---|---|
| Owner | Full organization access with all privileges. |
| Admin | Manage resources, members and teams. |
| DevOps | Deploy and manage infrastructure. |
| Billing Manager | Manage billing and subscriptions. |
| Member | Create and edit projects. |
| Viewer | Read-only access. |
Invite a member with a role
- Open Settings → Members.
- Under Invite members, enter the email address.
- Open Role and choose a role.
- Under Workspaces, choose All workspaces (including new ones) or Selected workspaces.
- Click Send invite.
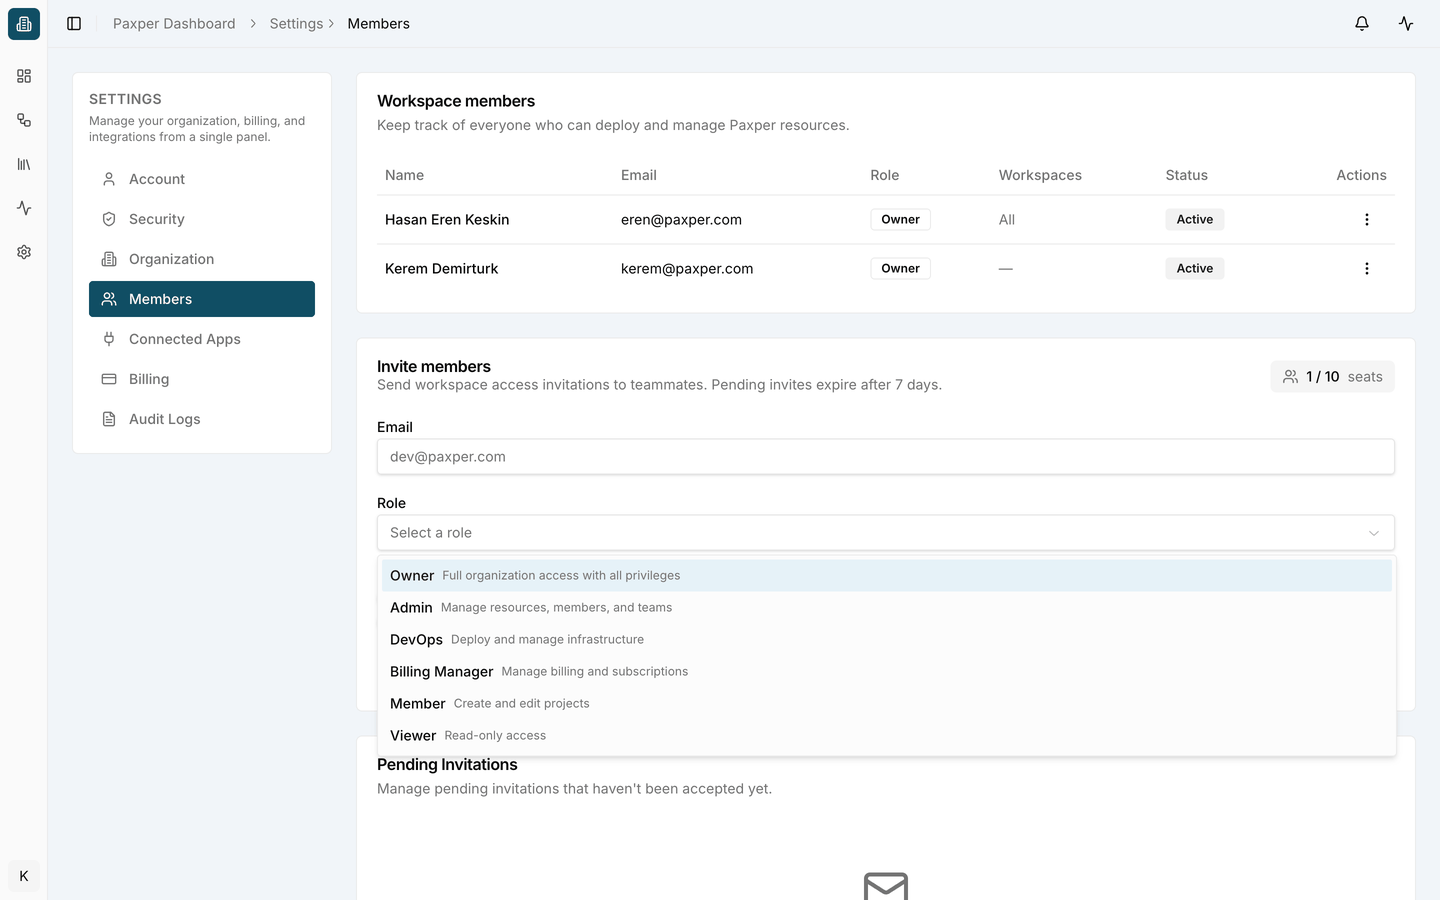
The seat counter shows how many seats are in use. Invitations expire after 7 days. Until they are accepted, they are listed under Pending Invitations.
Manage a member
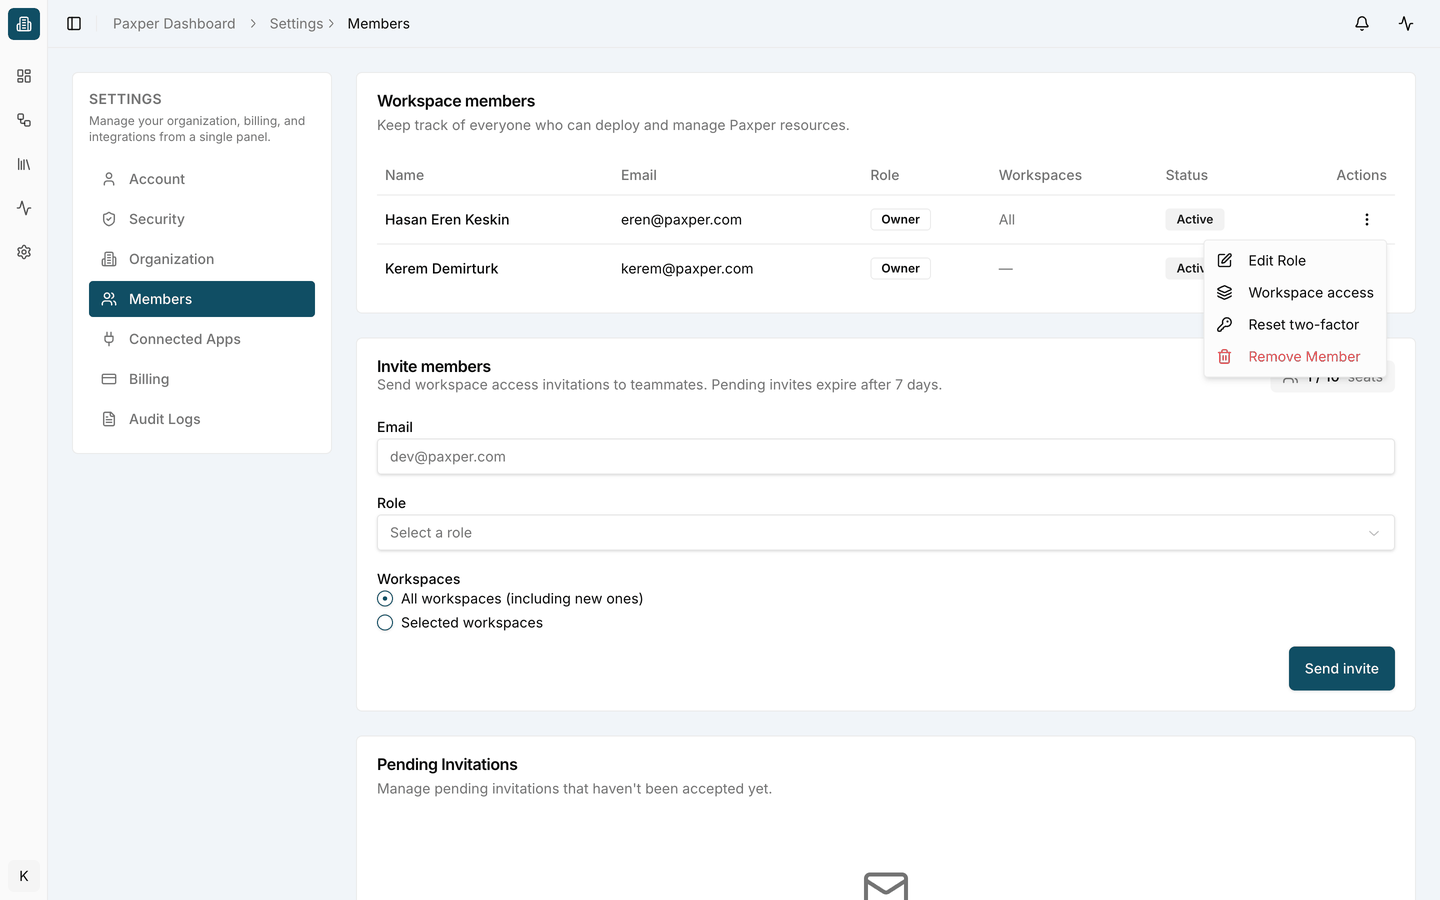
Click ⋮ in a member’s row:
- Edit Role – change the member’s role.
- Workspace access – choose which workspaces the member can reach.
- Reset two-factor – remove the member’s two-factor setup so they can set it up again, for example after losing their device.
- Remove Member – remove the member from the organization.
Limit workspace access
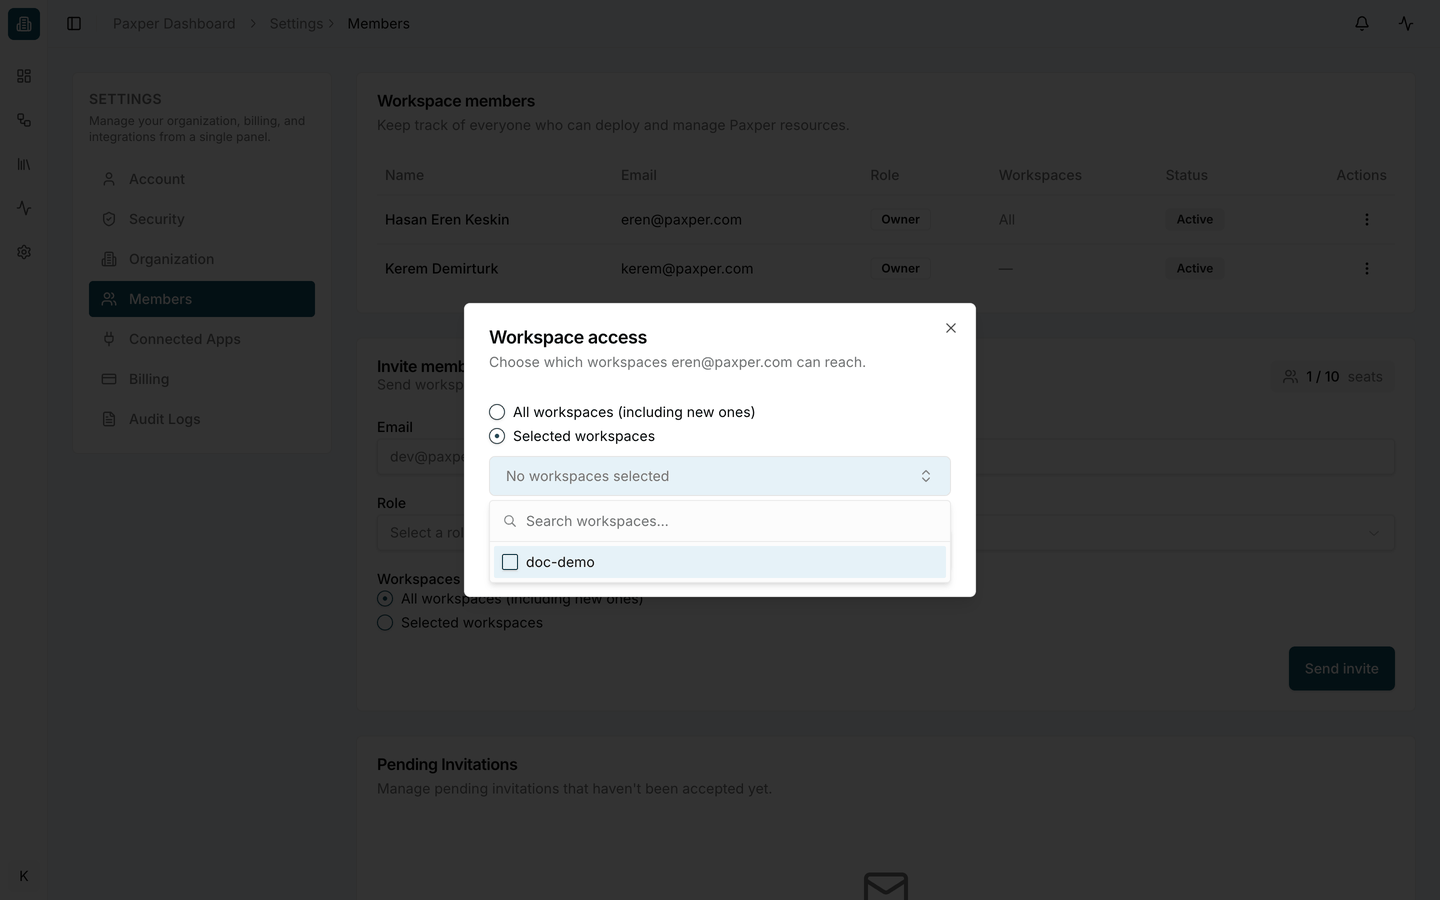
Choose Workspace access from the member’s ⋮ menu:
- All workspaces (including new ones) – the member can reach every workspace, including ones created later.
- Selected workspaces – open the list, search for and tick the workspaces the member may reach.
Click Save to apply the change.
Control who can use a credential
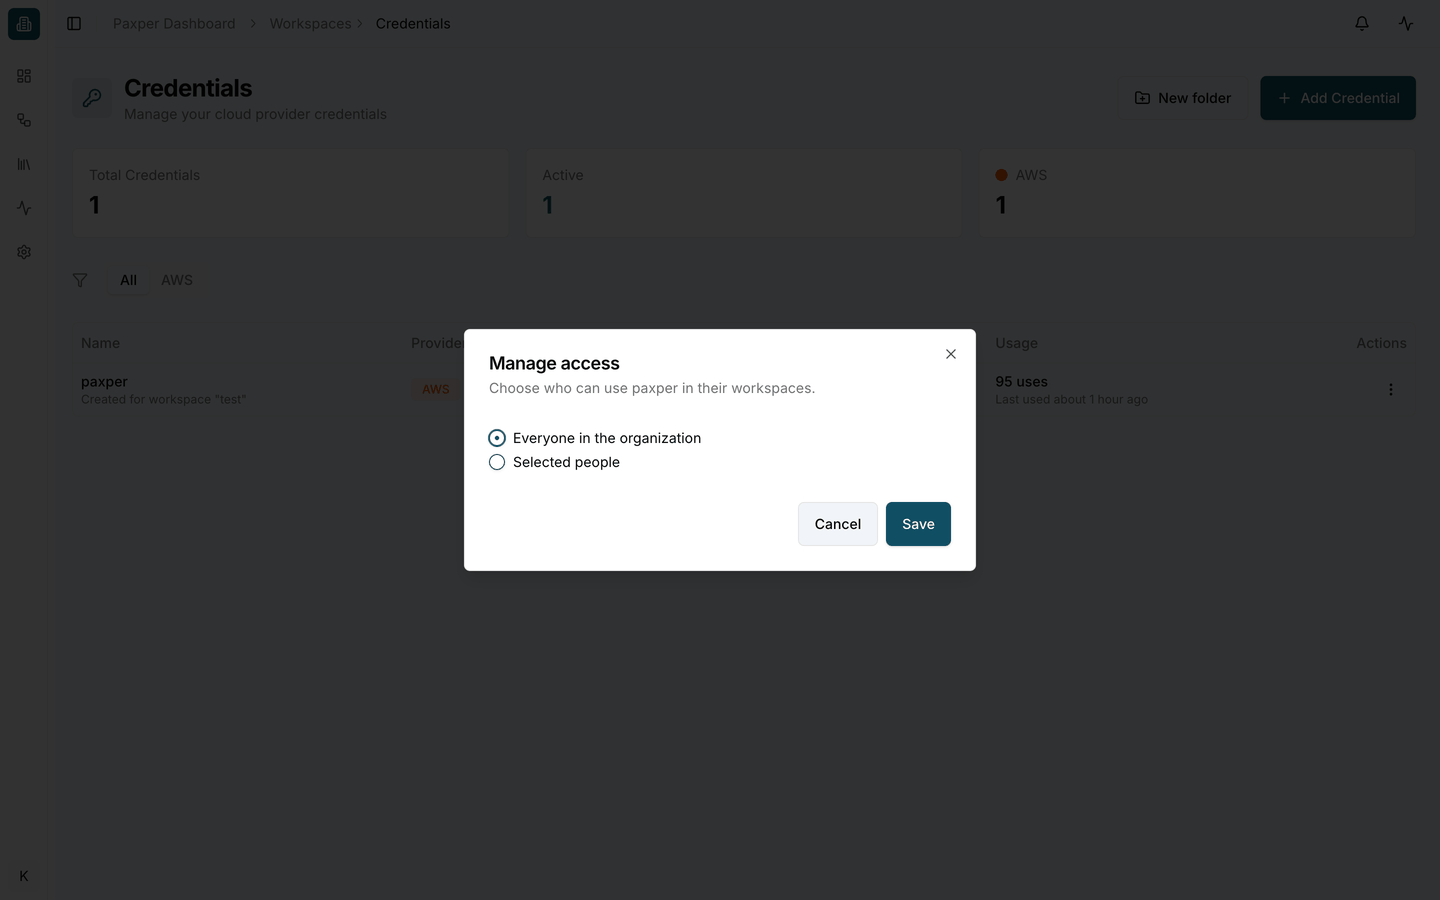
Cloud credentials can also be restricted. Open Workspaces → Credentials, click ⋮ next to a credential and choose Manage access:
- Everyone in the organization – any member can use the credential in their workspaces.
- Selected people – only the people you choose can use it.
Click Save to apply the change.
See Credentials for more about adding and managing credentials.
Last updated on