Applying and Destroying
An apply creates or updates real resources in your cloud account. A destroy removes them again. Both run as jobs, just like a plan, and you can follow them step by step in the Execution tab.
Applying creates real cloud resources that may cost money. Run a plan first (see Running a Plan) and check what will be created.
Apply a resource
- Open the Diagram tab.
- Hover over the resource you want to apply.
- Click the Apply Resource icon (play button) in the resource toolbar.
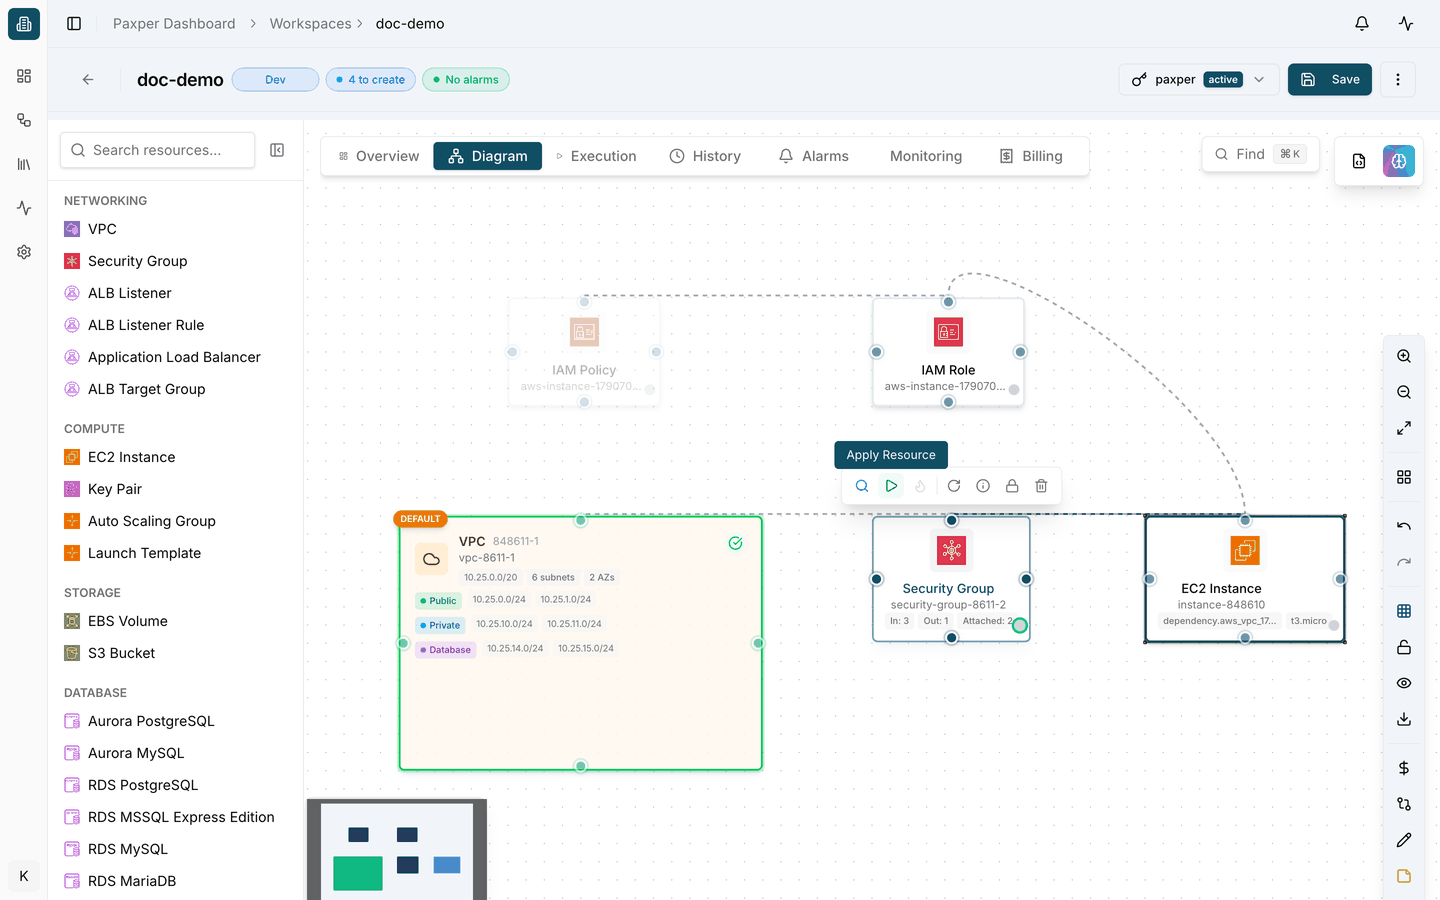
If everything the resource needs is already in place, Paxper shows Ready to Apply. Click Apply to start the job.
If another operation is still running in the workspace, the apply is queued and starts as soon as the current operation finishes.
Dependencies
If the resource depends on resources that haven’t been applied yet (they are still Draft), Paxper lists them in Dependencies Required. Only the selected resource will be applied, and the operation may fail if its dependencies don’t exist yet. Apply the dependencies first, or click Apply Anyway.
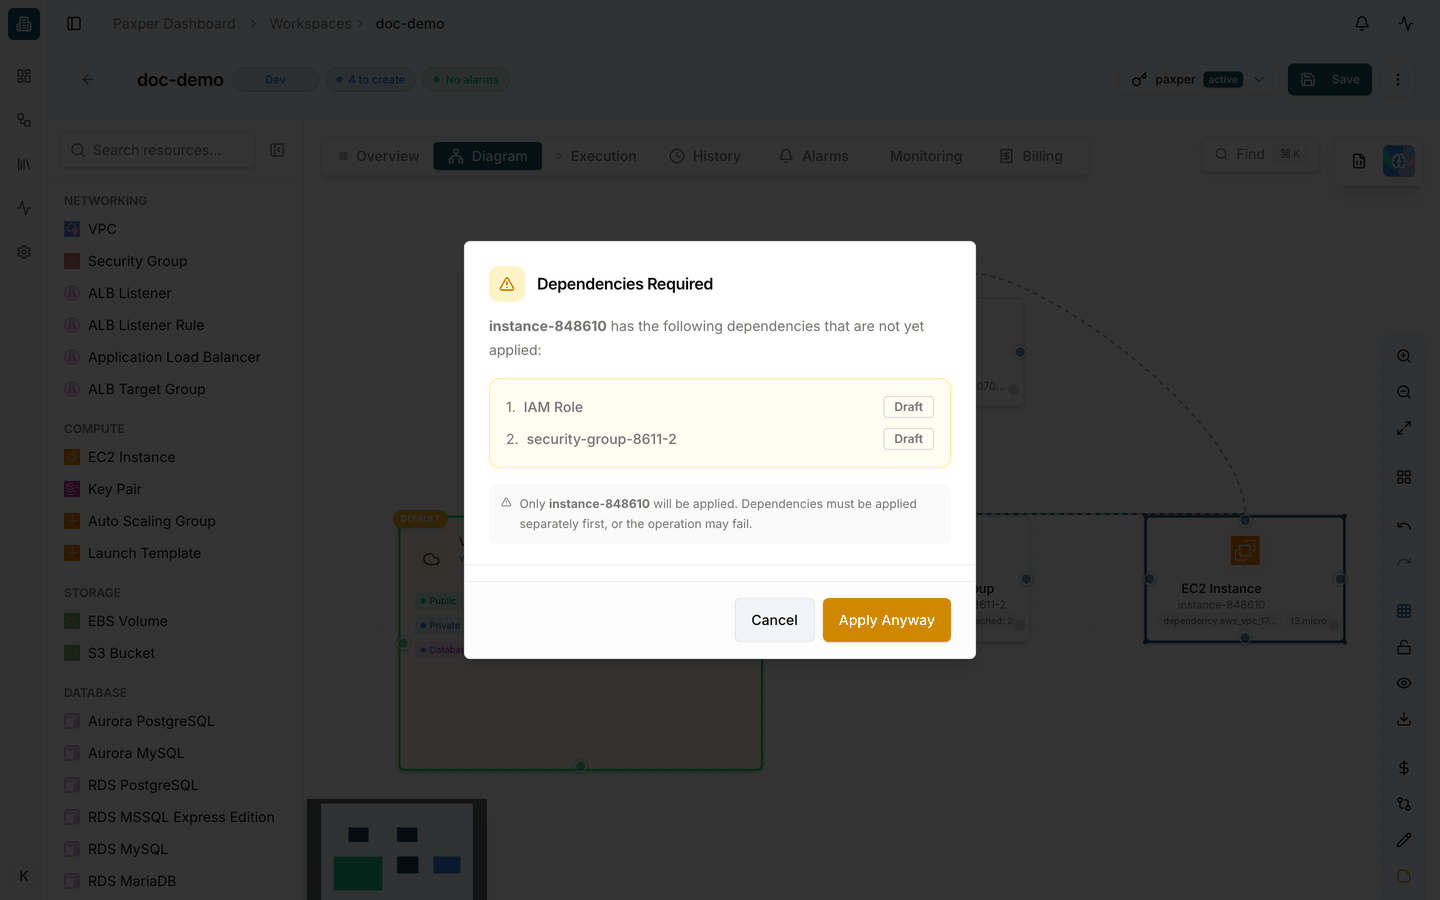
Apply resources in order: start with resources that have no dependencies, such as the VPC, and work your way up to the resources that use them.
Follow the apply job
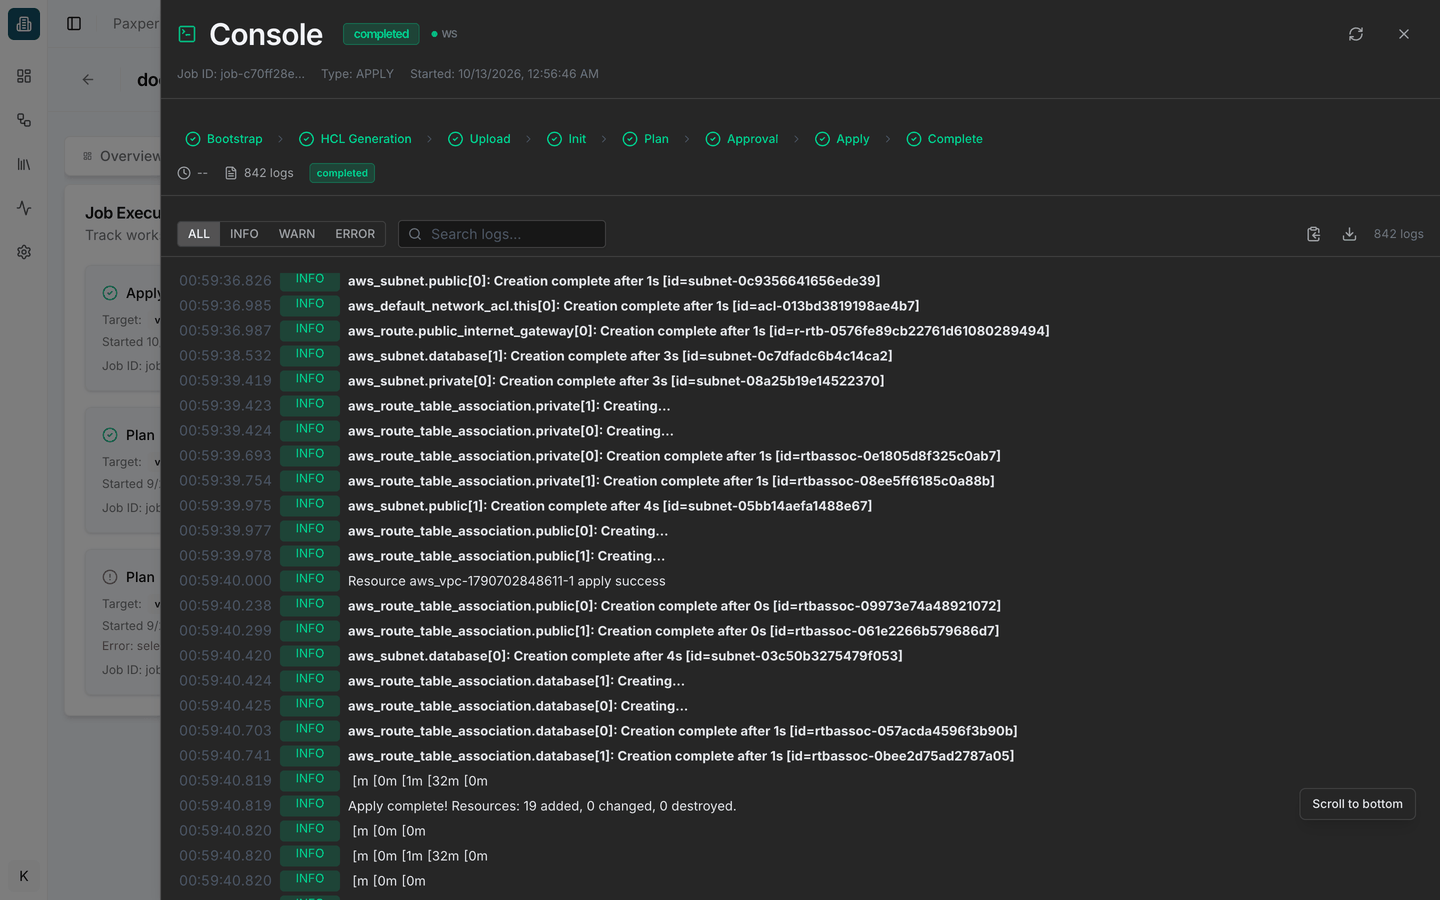
Paxper switches to the Execution tab. An apply job first runs a plan, then applies it. The console shows the stages: Bootstrap → HCL Generation → Upload → Init → Plan → Approval → Apply → Complete.
If the workspace requires manual approval, the job pauses at Approval with the status awaiting_approval. Review the plan in the Console, then click Approve & Apply to continue or Decline to stop. See Approvals.
When the job finishes, its card shows completed.
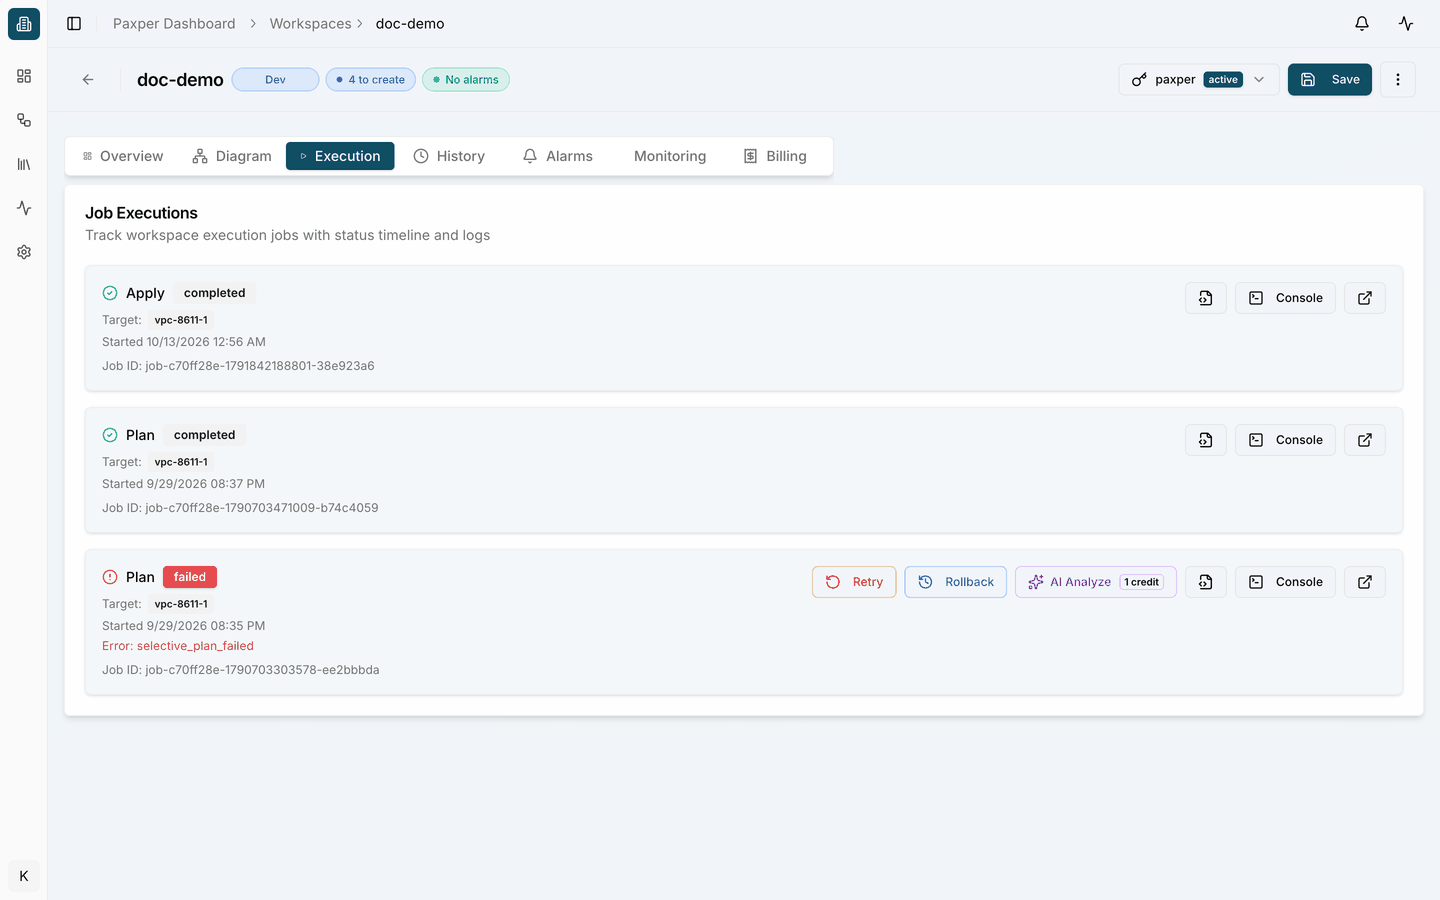
Click Console to see the full log. Each resource reports Creation complete, and a successful apply ends with a summary such as Apply complete! Resources: 19 added, 0 changed, 0 destroyed.
On the canvas, an applied resource shows a green check mark. Its Apply tooltip changes to Already Applied, and the workspace header updates the number of resources still to create.
Destroy a resource
- Hover over an applied resource on the canvas.
- Click the Destroy icon (flame) in the resource toolbar.
- Paxper asks you to confirm. Click Destroy.
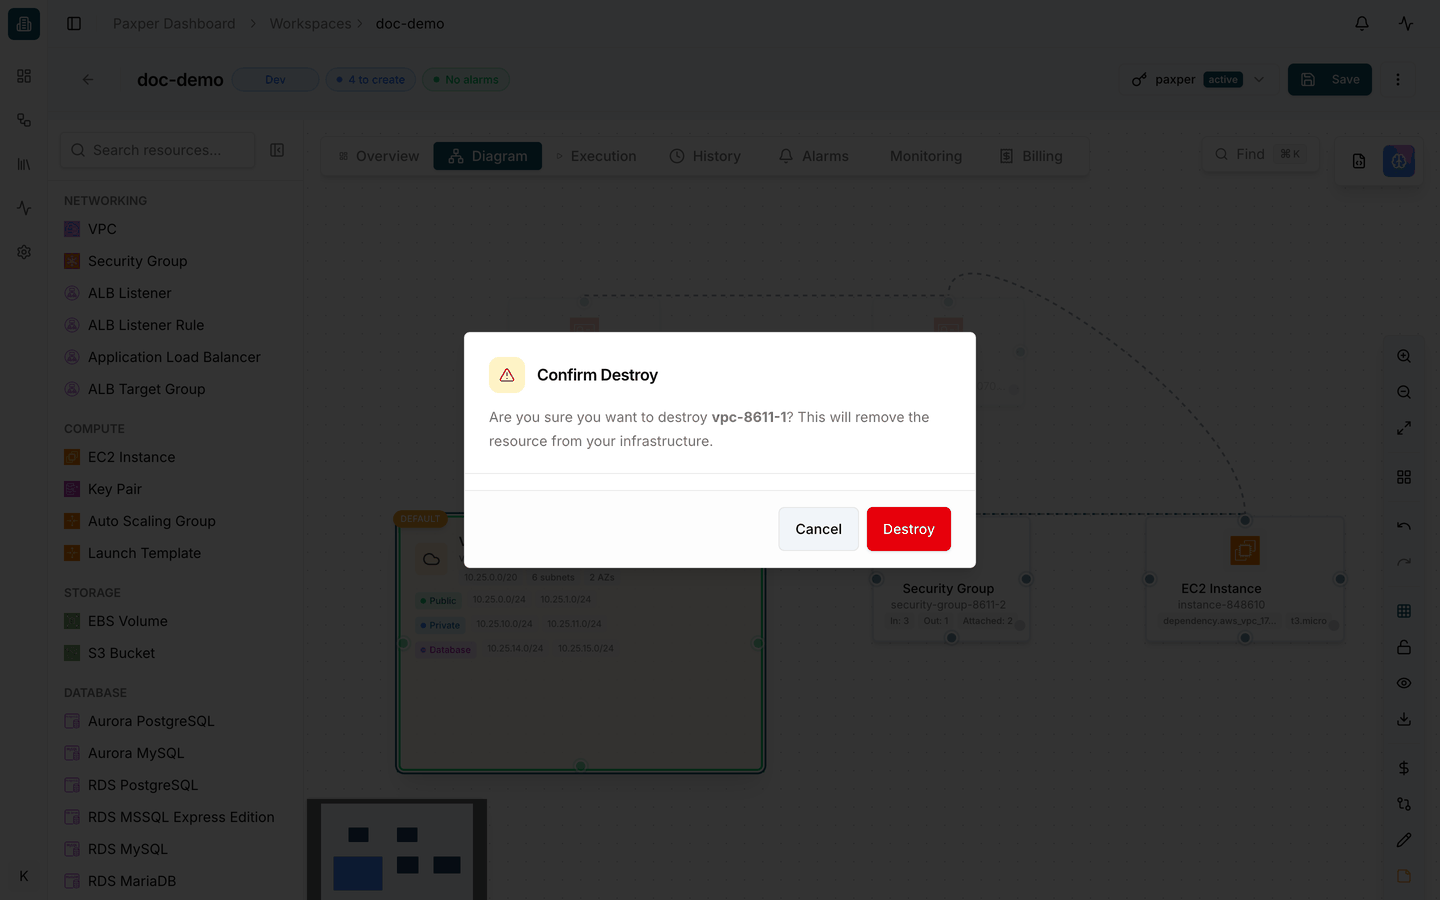
The destroy job runs in the Execution tab and, like an apply, may wait for approval (Approve and Destroy). A successful destroy ends with a summary such as Resources: 0 added, 0 changed, 19 destroyed. The resource is marked destroyed: it stays on your canvas and can be applied again later.
Destroying removes the resource and everything it contains from your cloud account. This cannot be undone.
Roll back a failed job
When a job fails, its card offers Rollback. Paxper asks you to confirm Rollback to Last Successful Deployment: it re-applies the configuration from your last successful deployment, and the current failed changes are reverted where possible. A new rollback job is created and queued, and it may require approval before it applies.
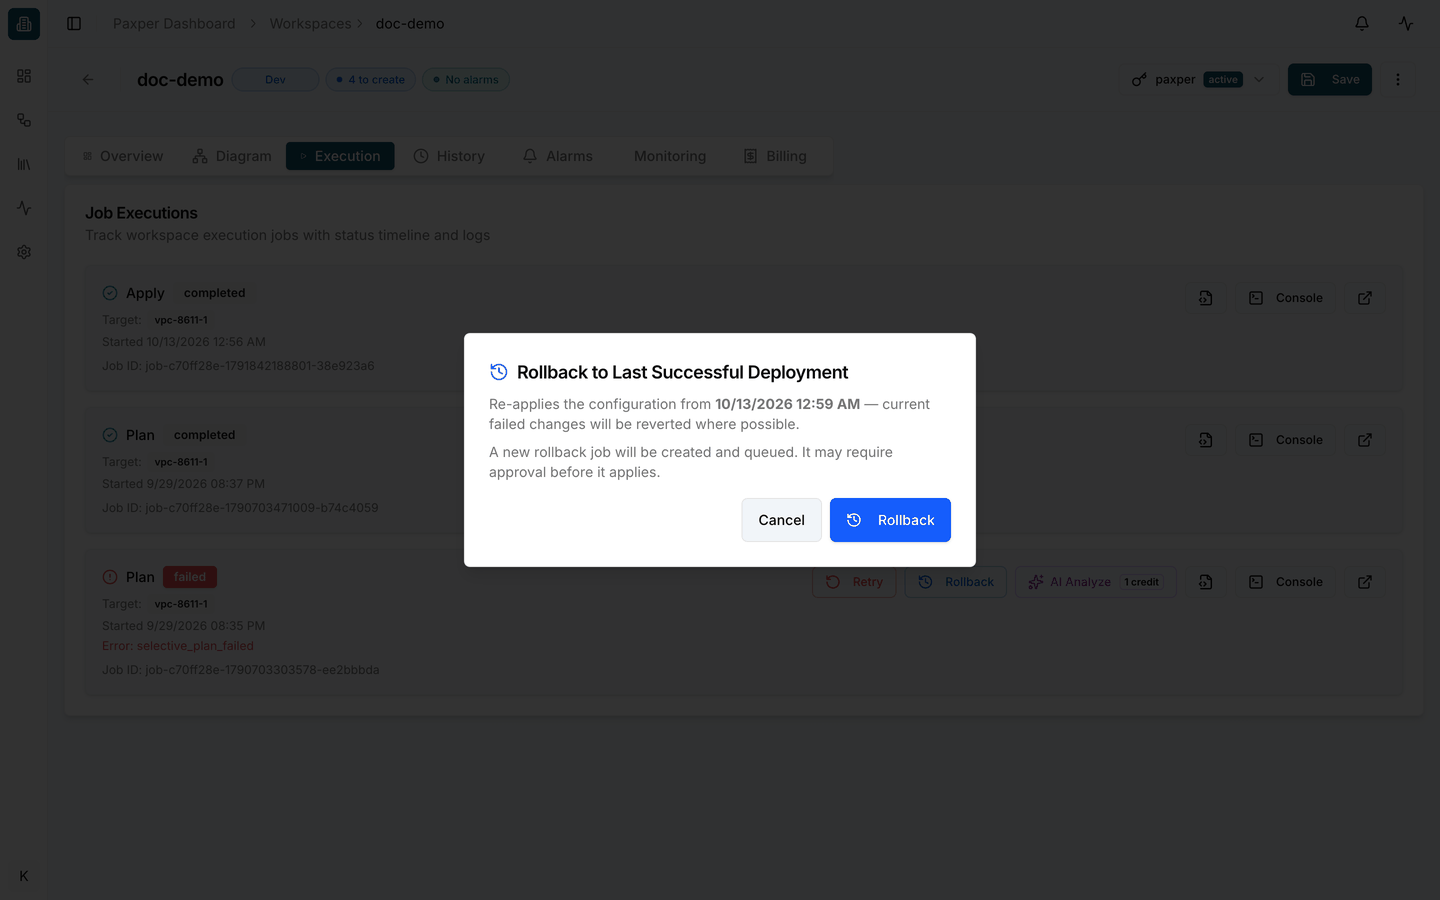
The failed job card also offers Retry and AI Analyze (see Running a Plan).